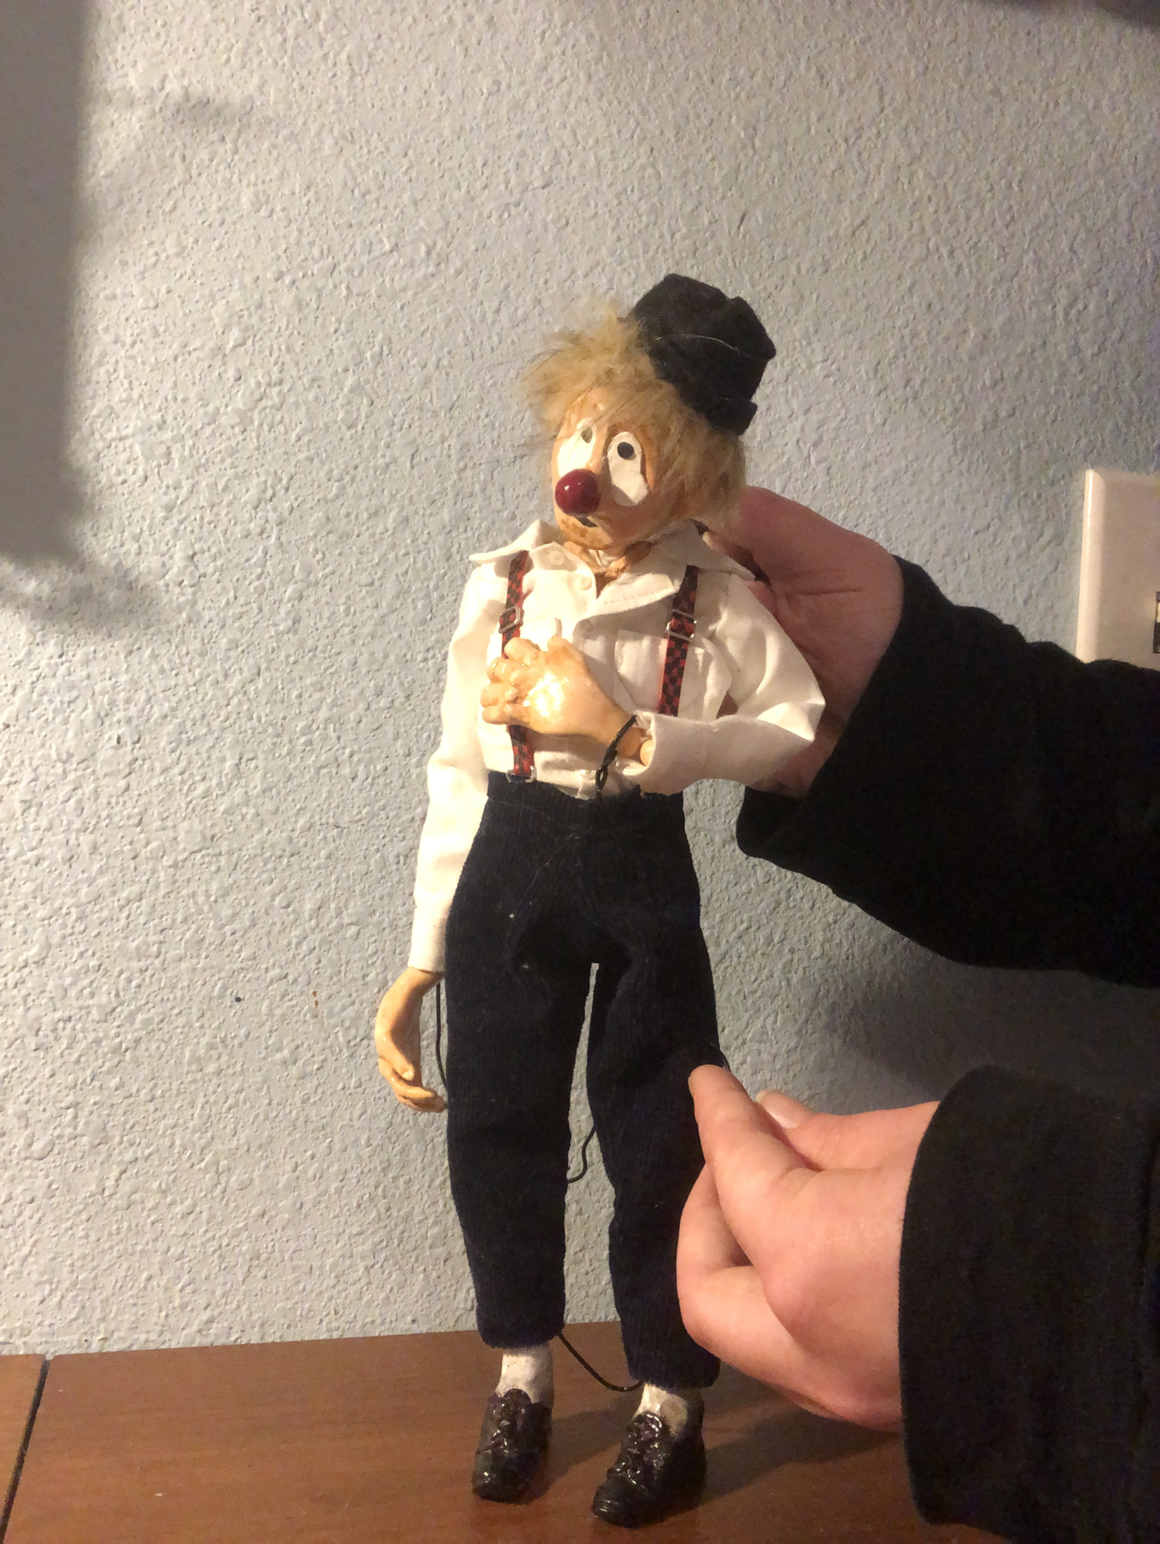
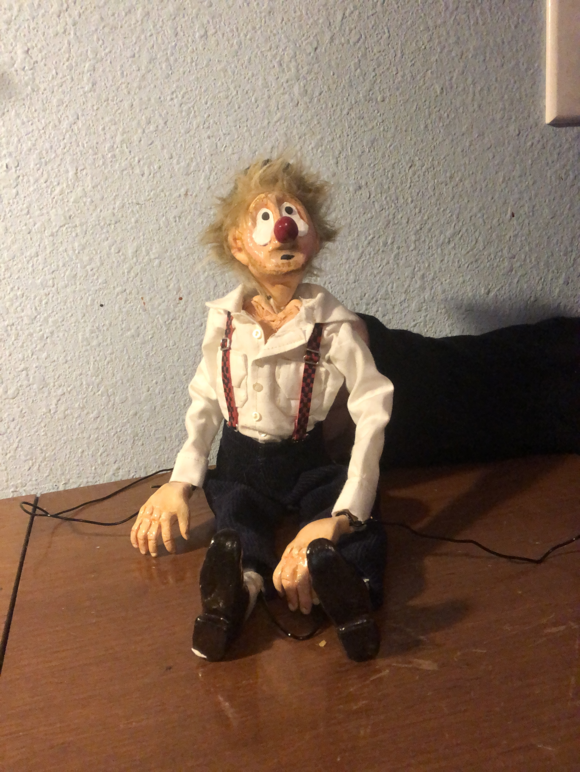
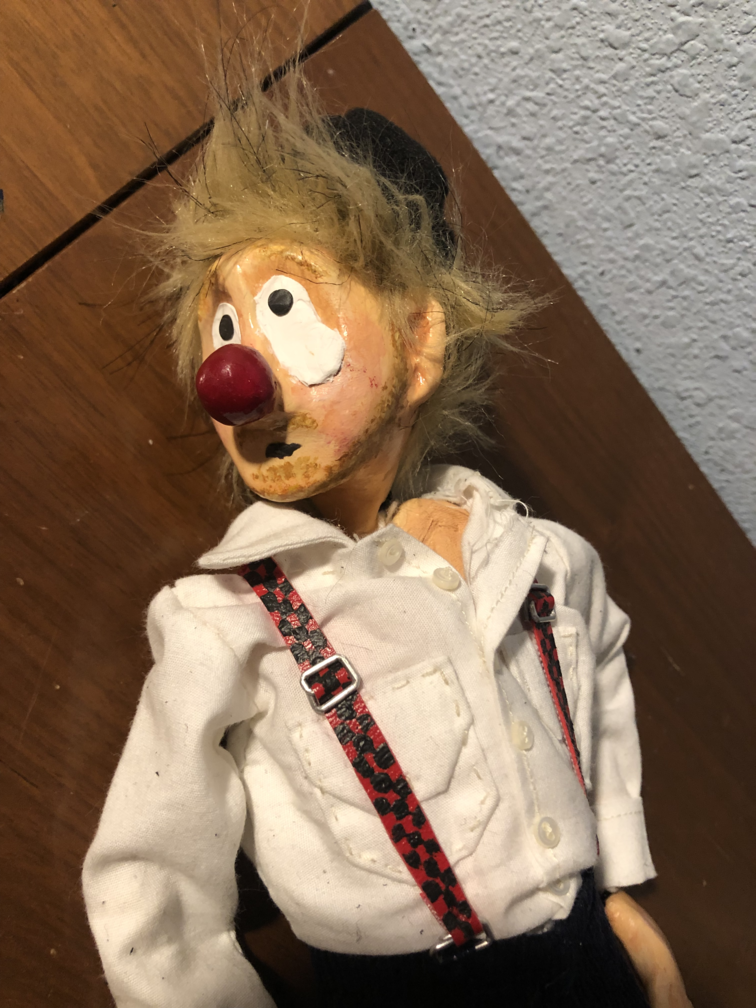
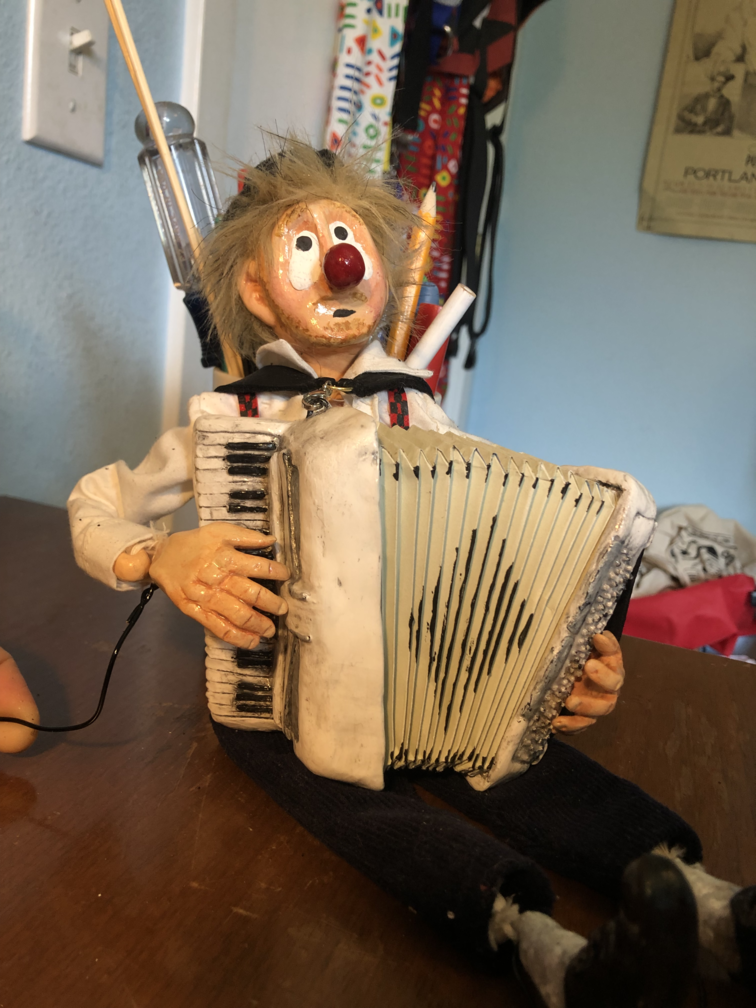
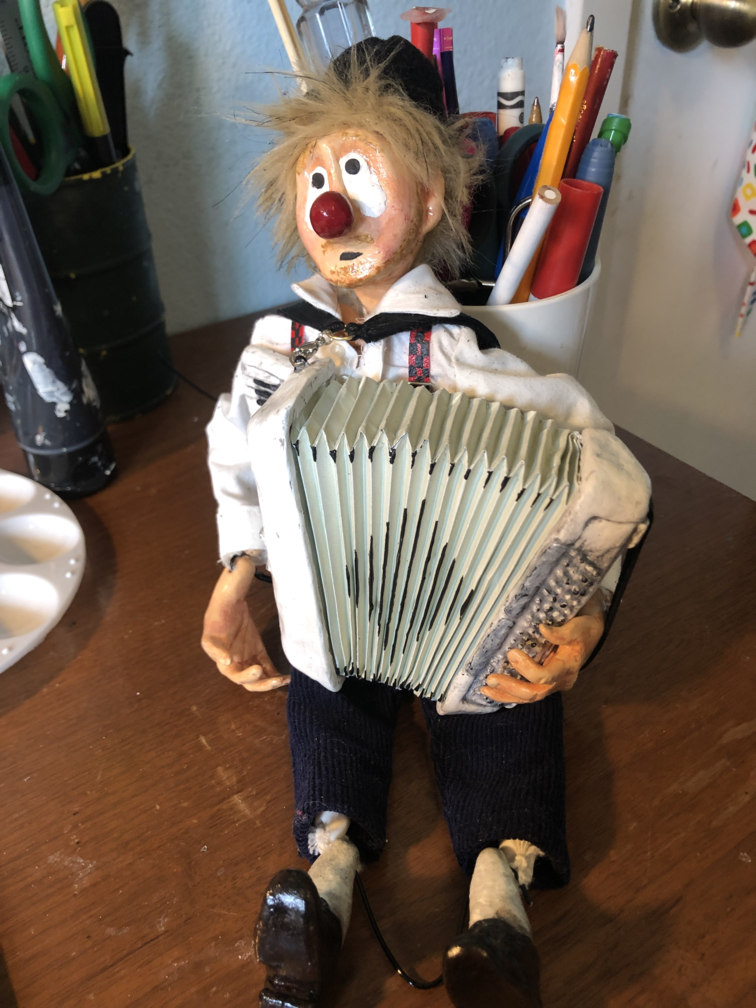
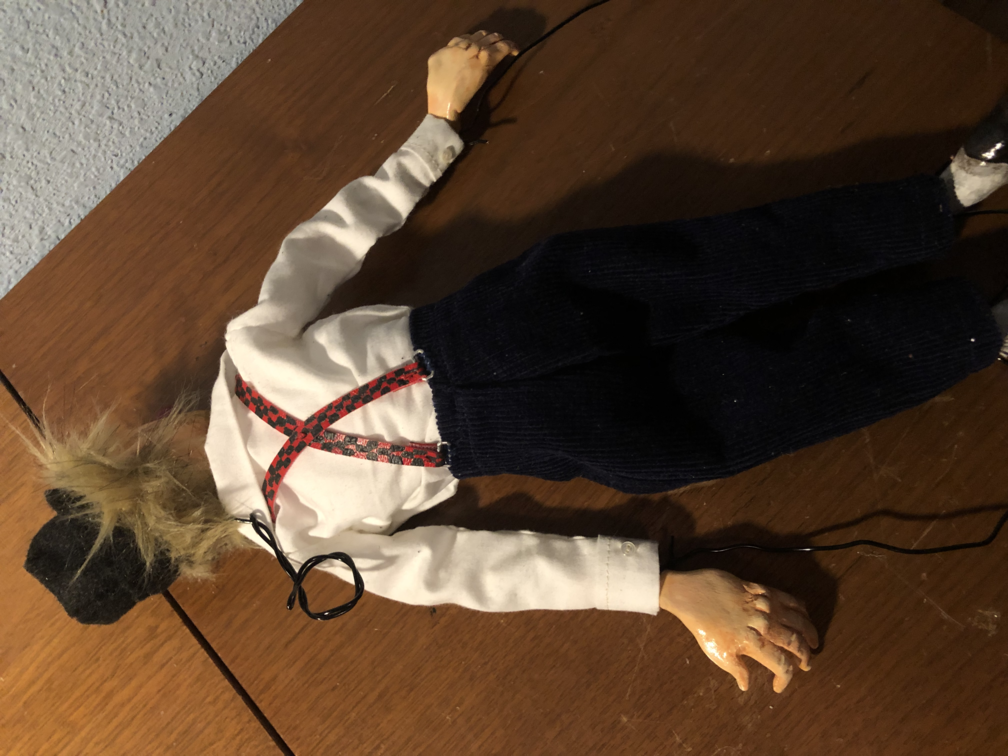
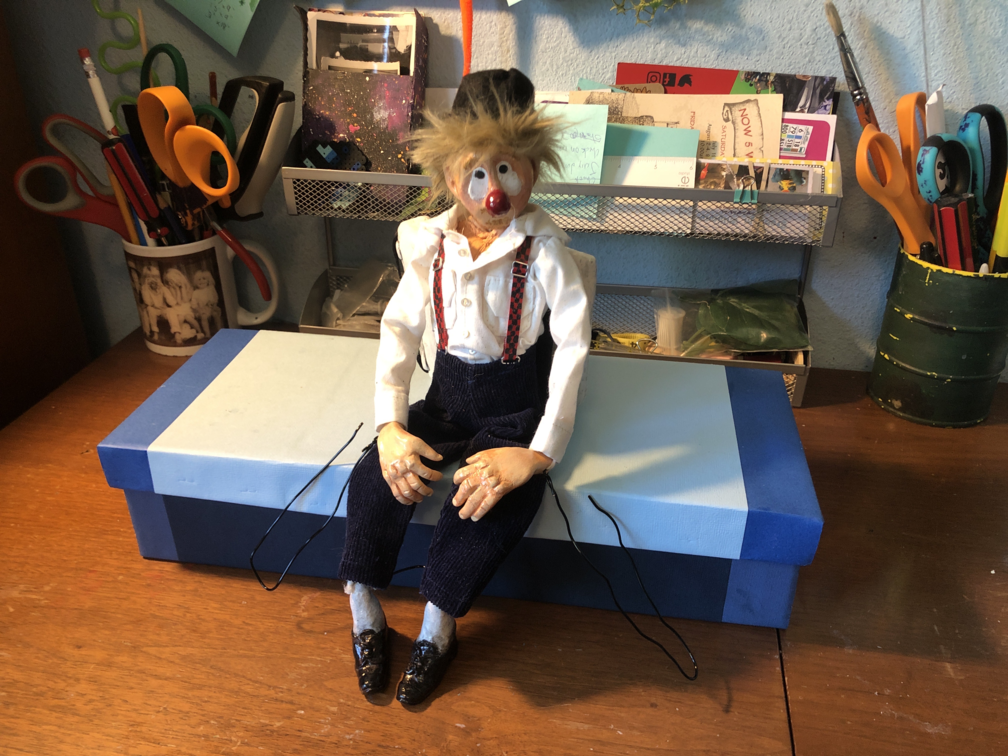
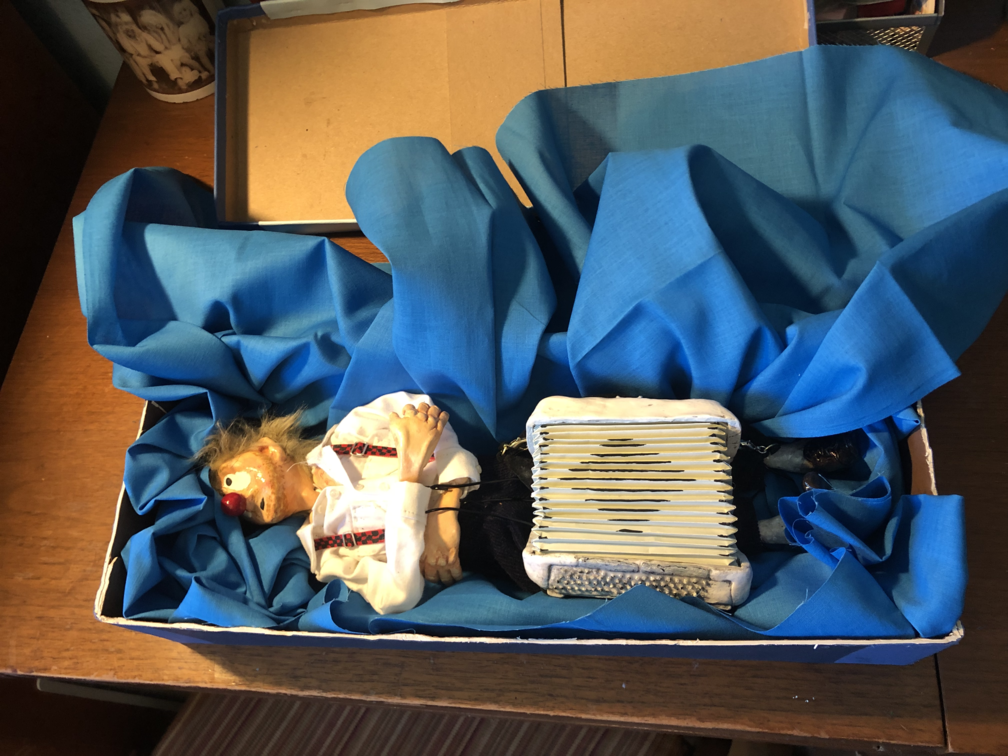
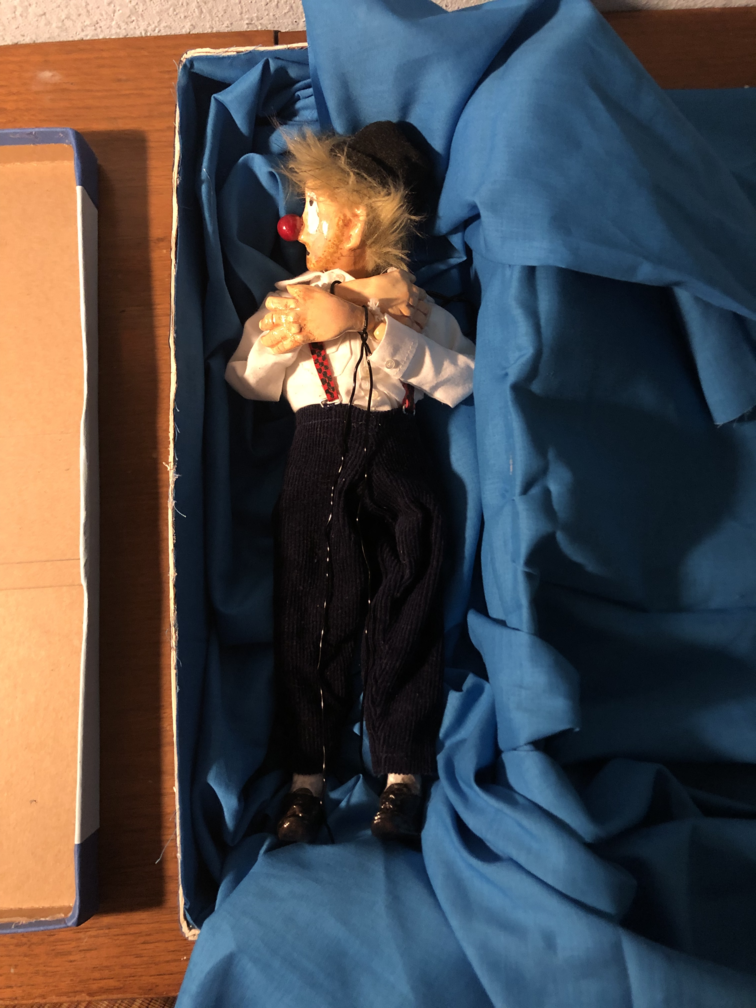
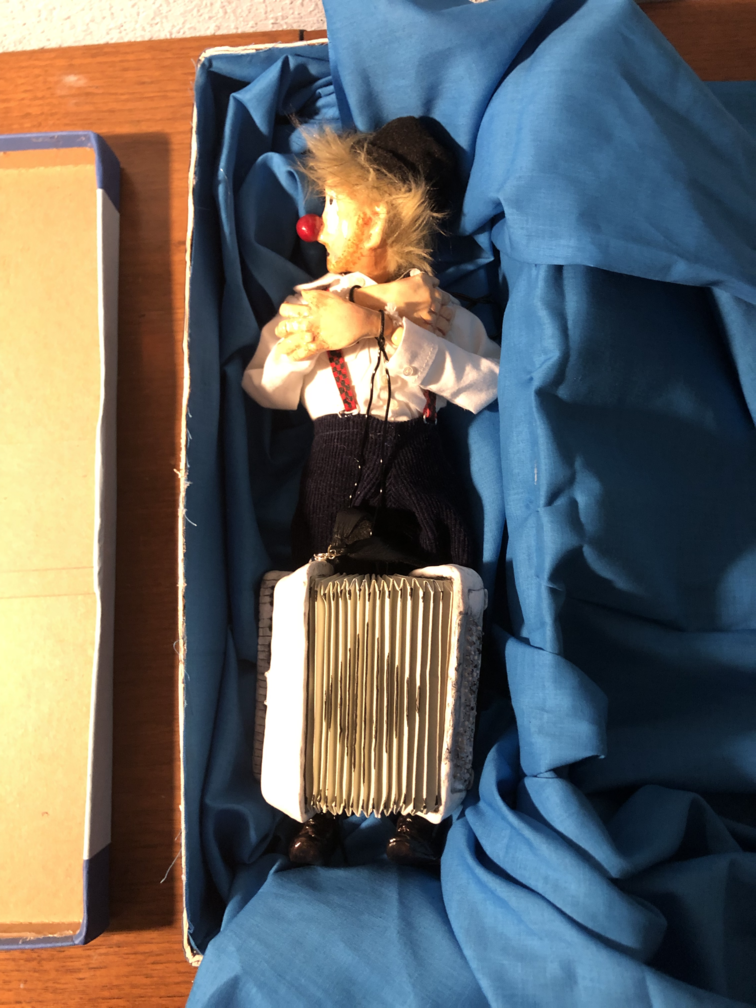
Gallery


References
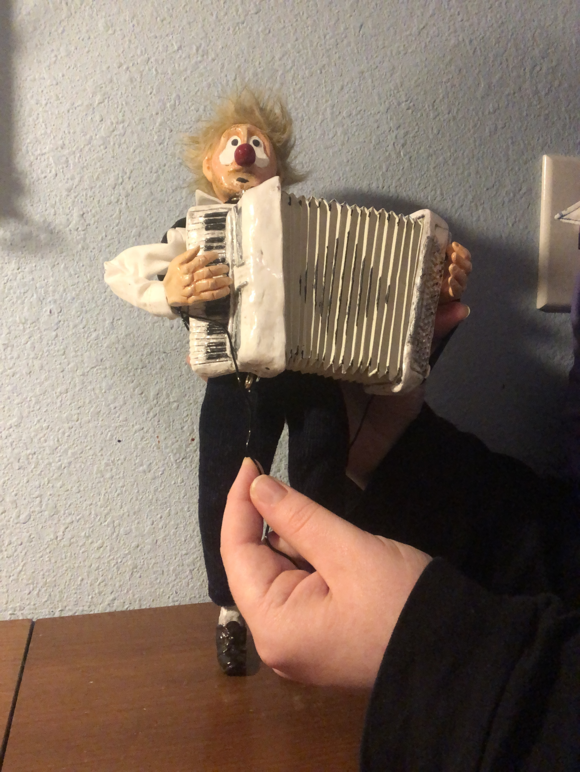
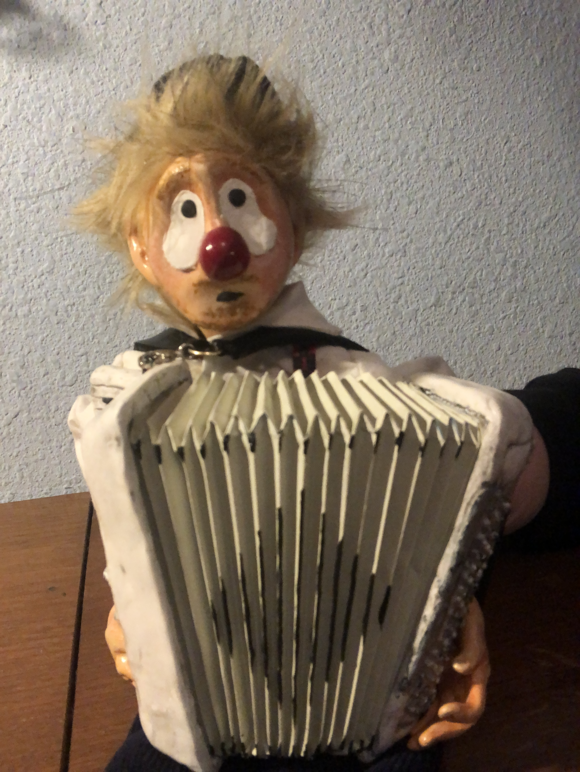
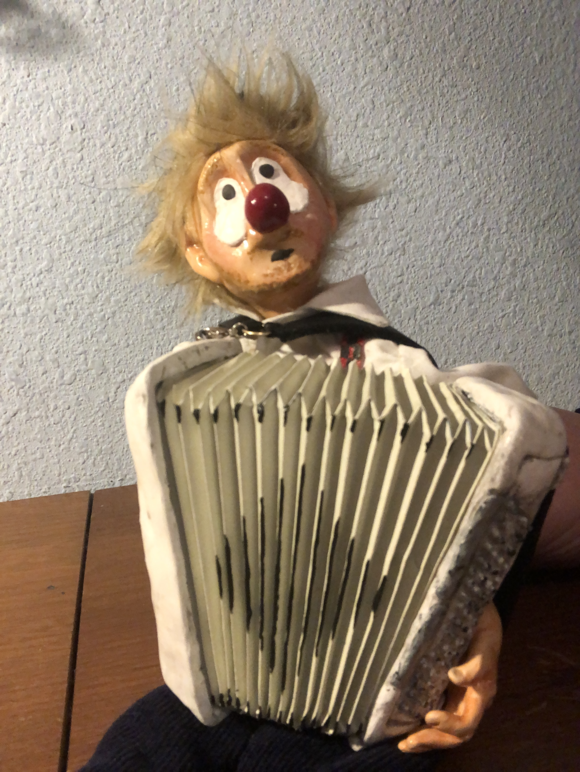
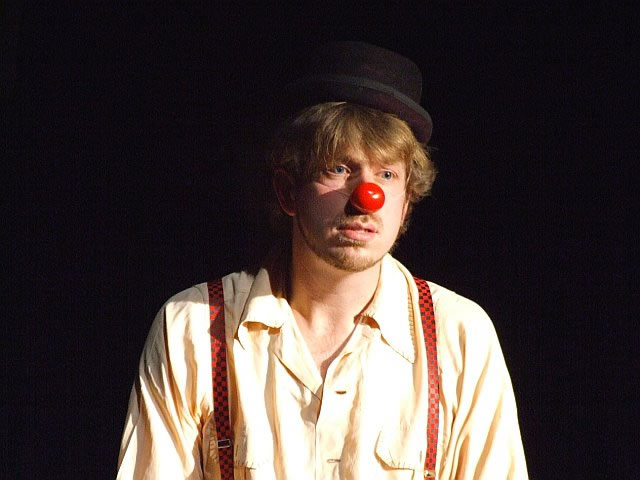
This puppet is based on Dave Malloy's portrayal of Job in his show Clown Bible in 2007. Since he plays the accordion in the show, I also wanted to challenge myself to make an accordion prop. However, the picture below is the sole image I have been able to find of him in the show, so I needed another reference. Below are images from another show of his, Beowulf, which premired in 2008. I figured it was either safe to assume he used the same accordion in both shows only a year apart, or at least it was close enough to satisfy any reasonable judge on accuracy.

Dave Malloy as Hrothgar in Beowulf. Image from his website.
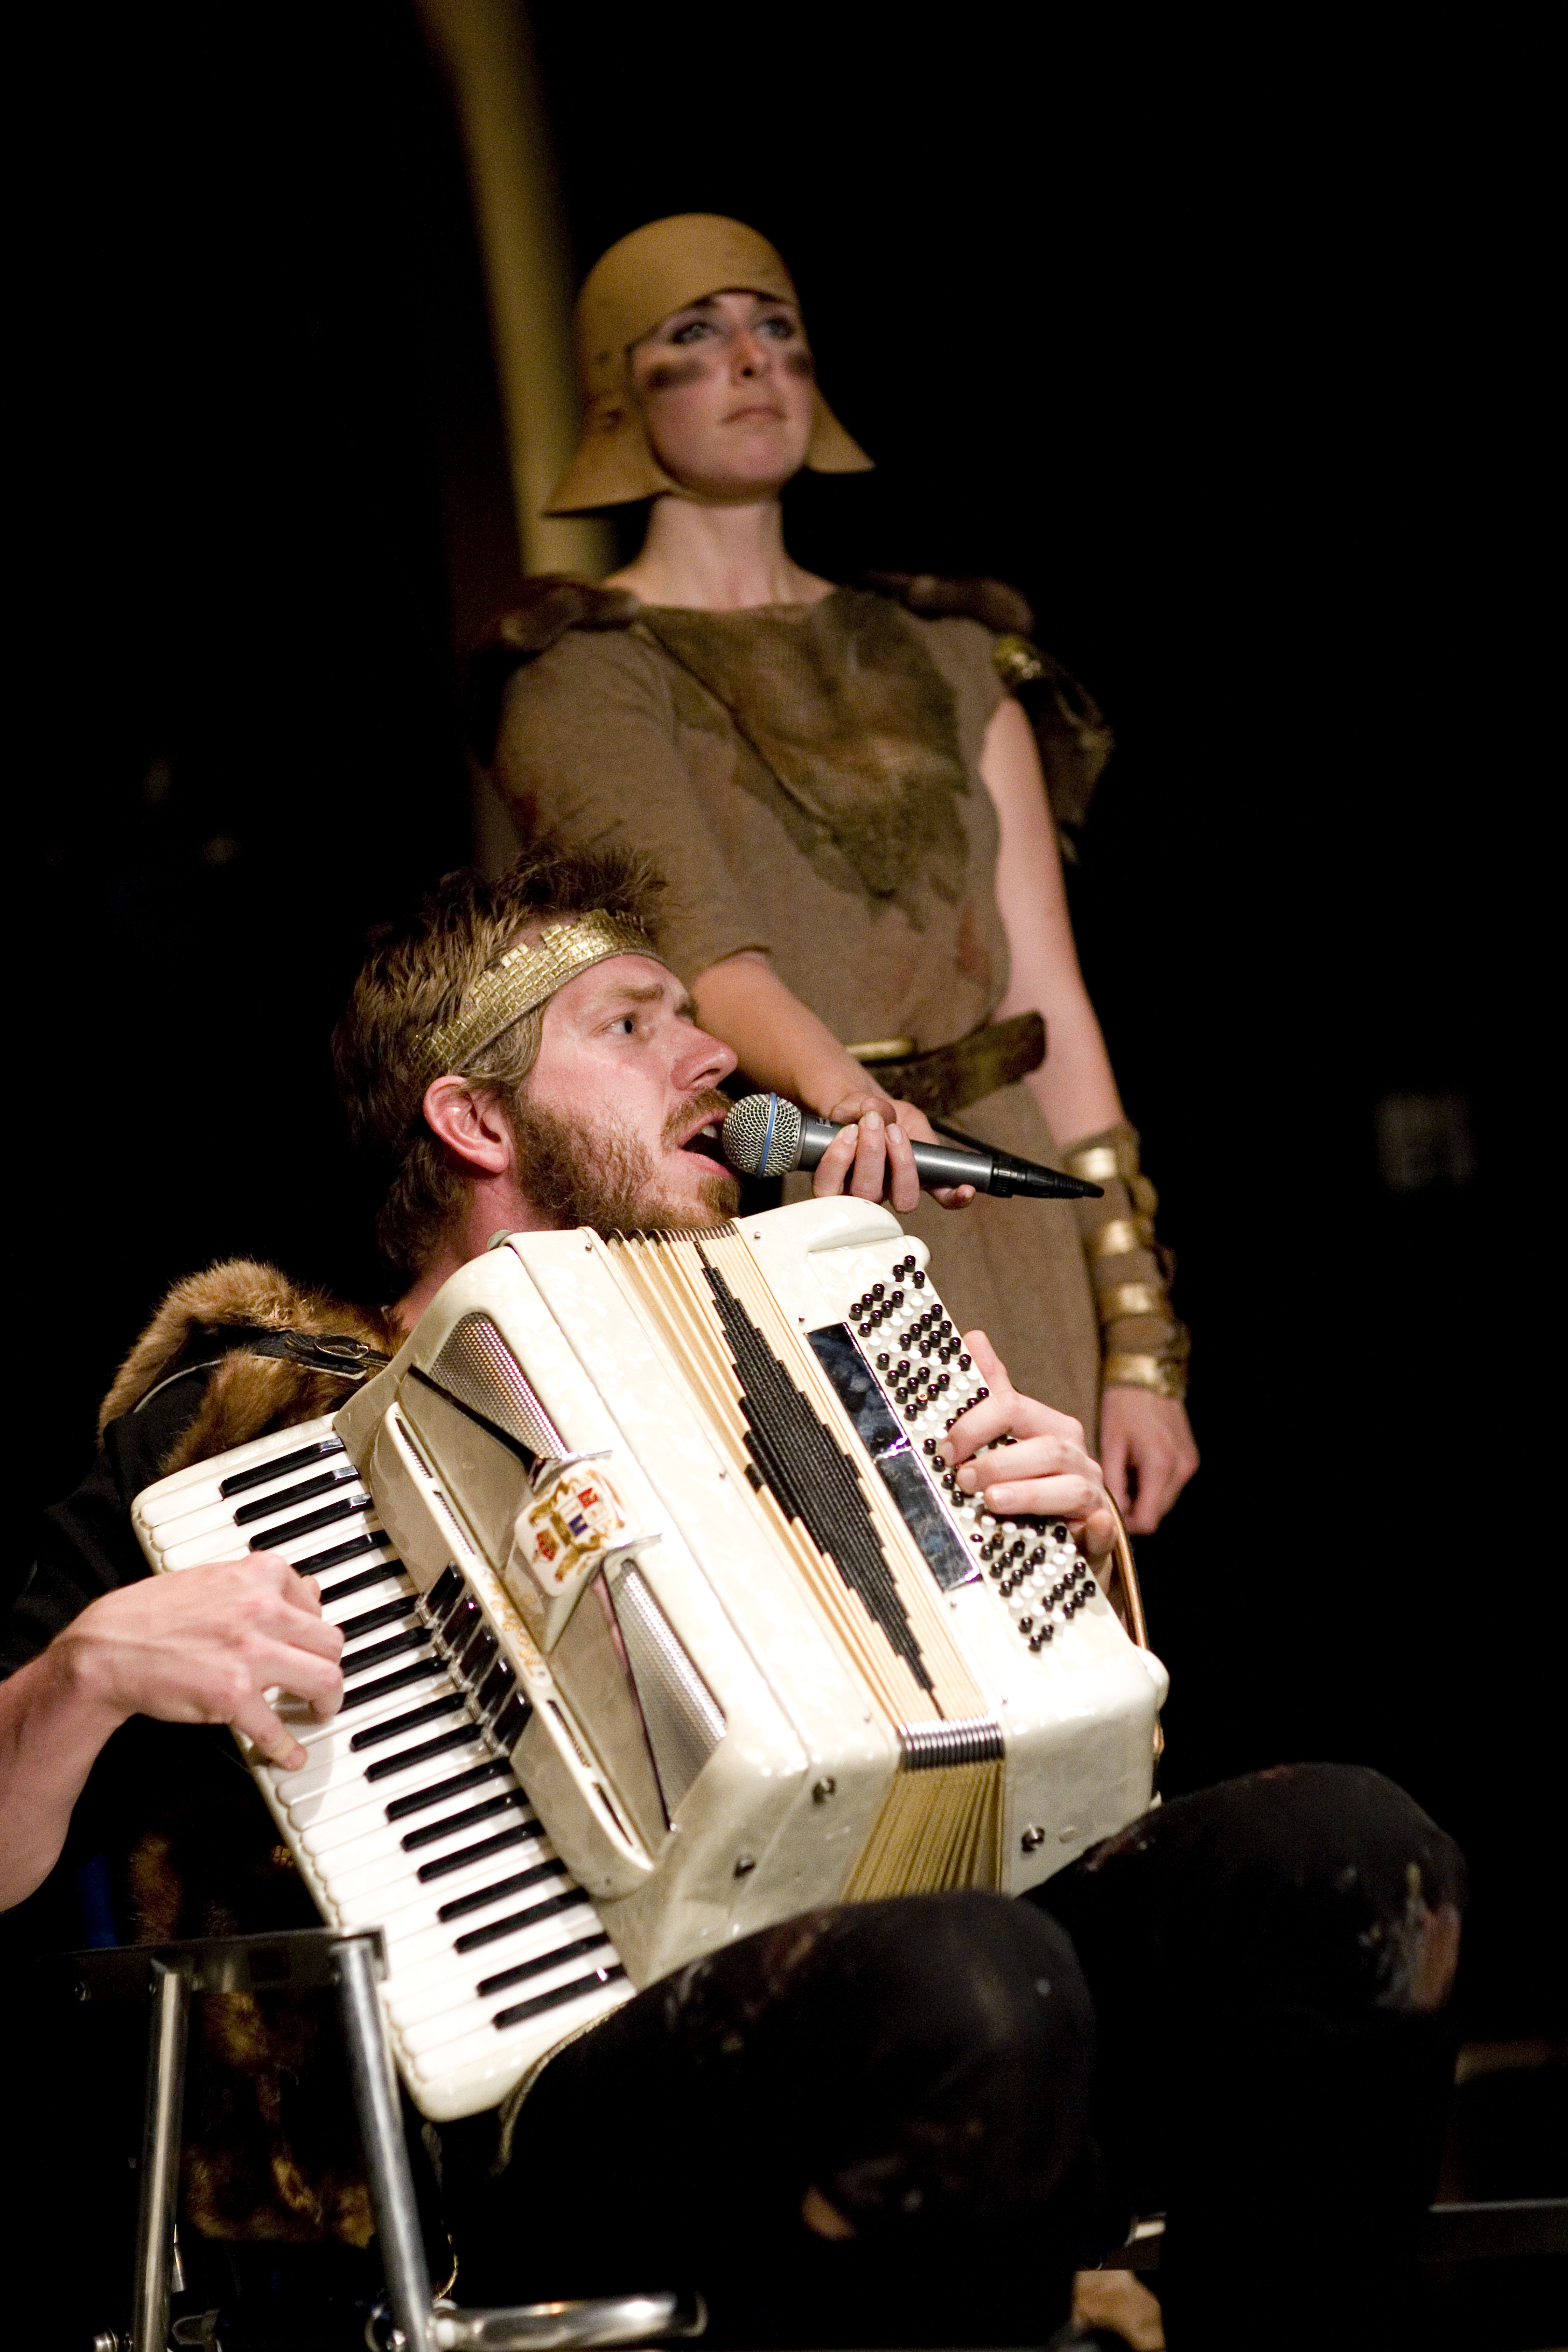
Dave Malloy as Hrothgar in Beowulf. Image from his website.
Puppet Process
Since I made Job directly after making my Jack et La Mécanique Du Coeur puppet, I was able to reference my process. I also wont be going into nearly as much detail here, and if you're interested in a more thorough tutorial you should check out that project as well.
May 5th
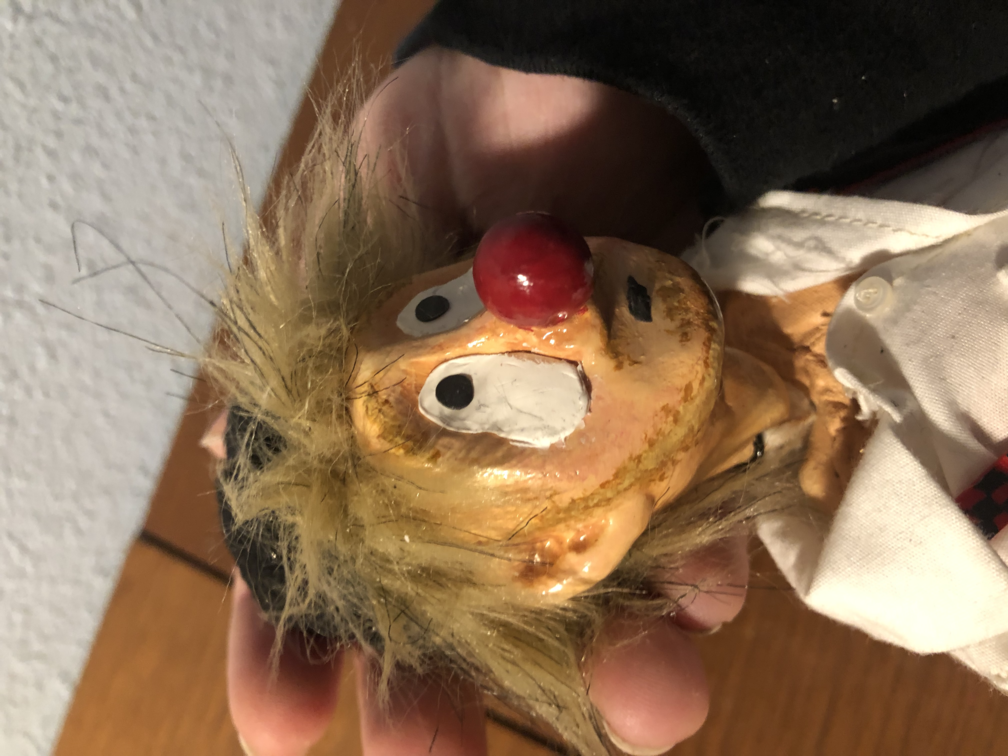
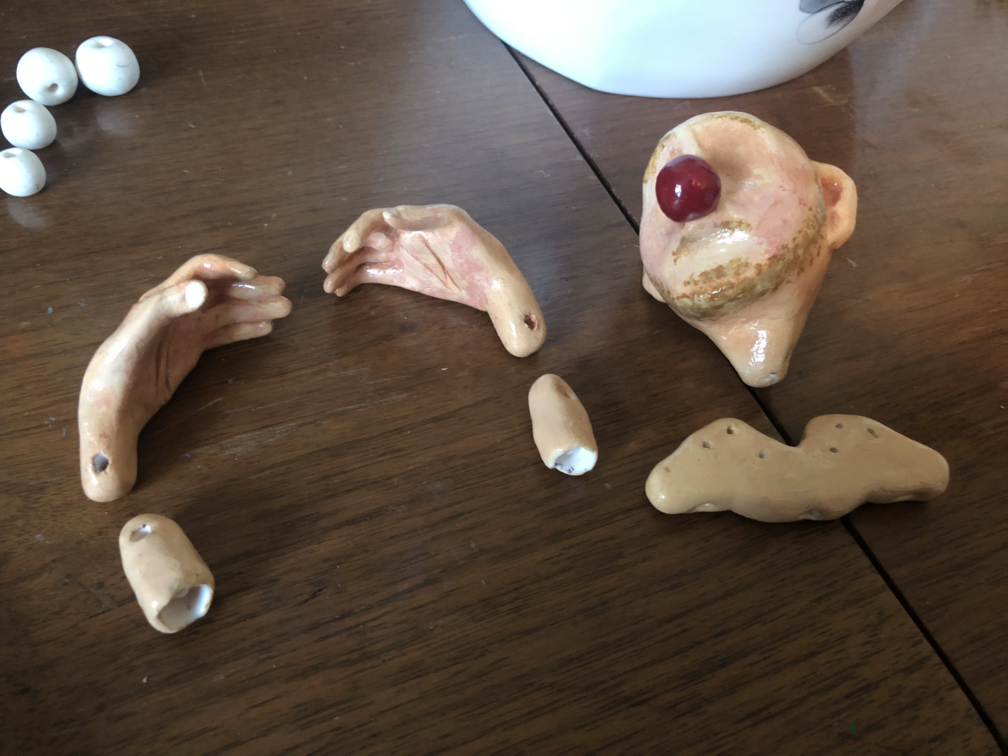
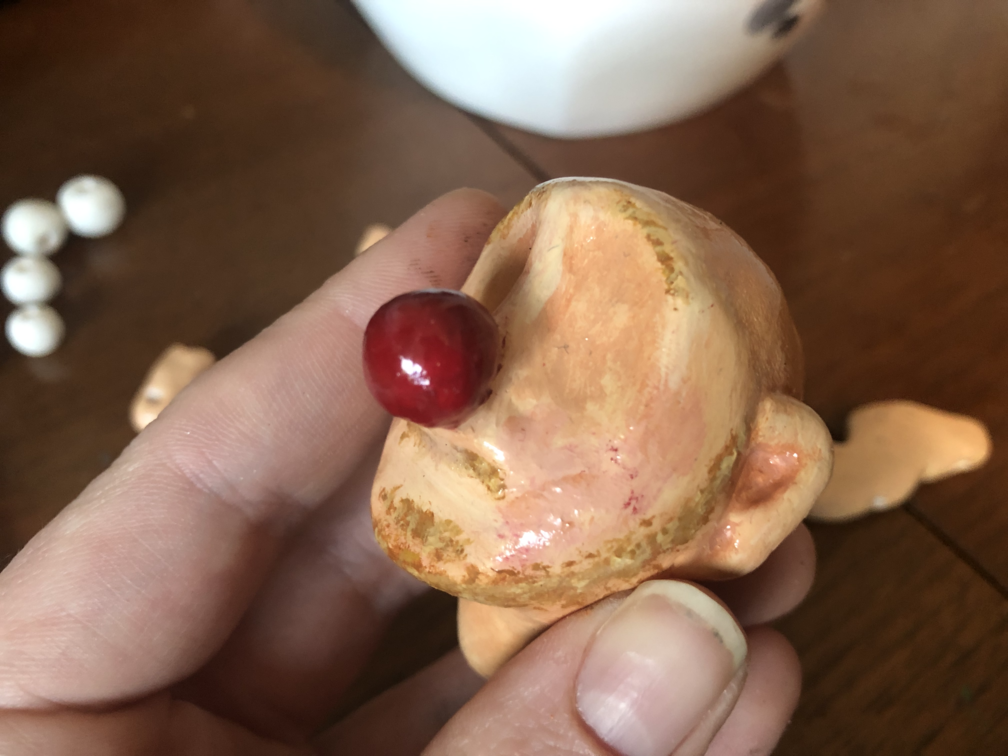
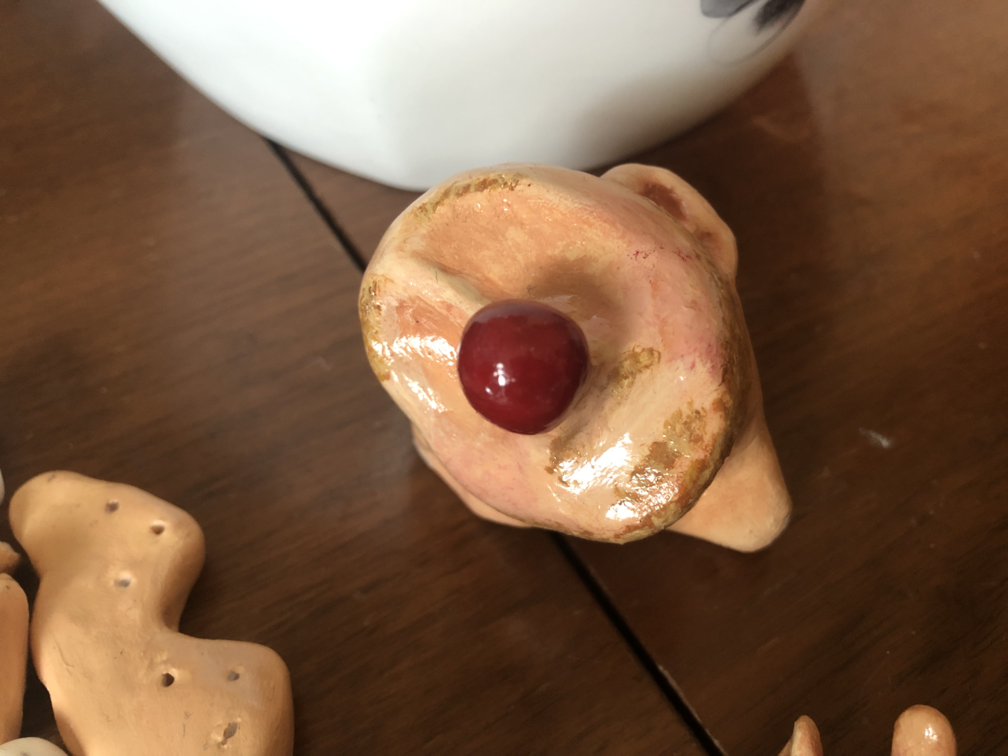
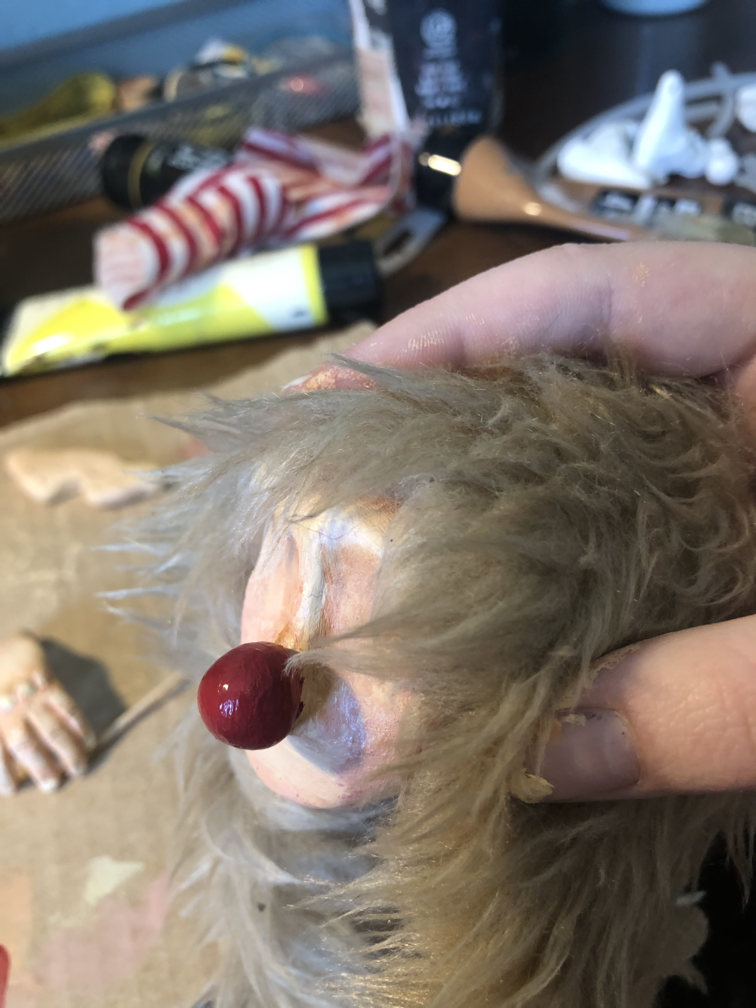
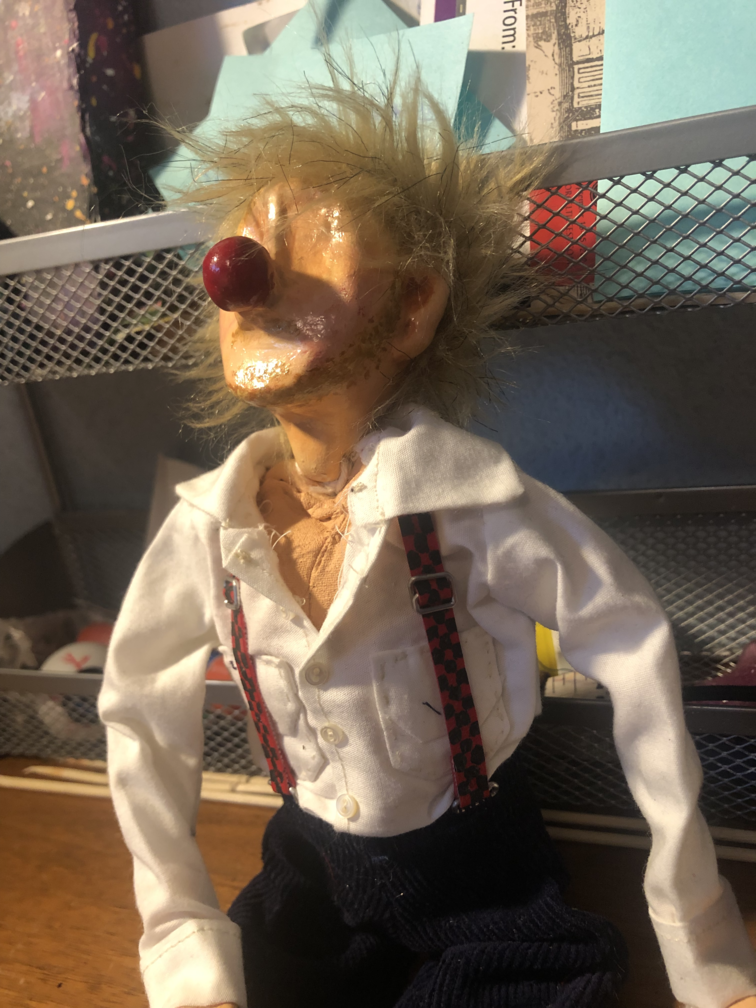
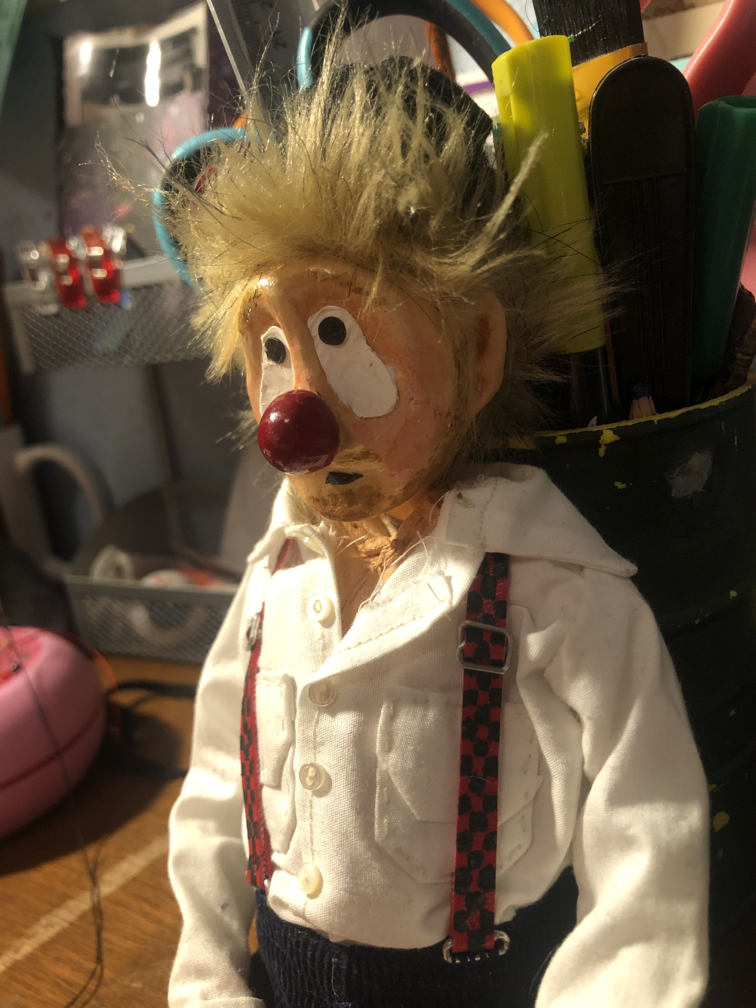
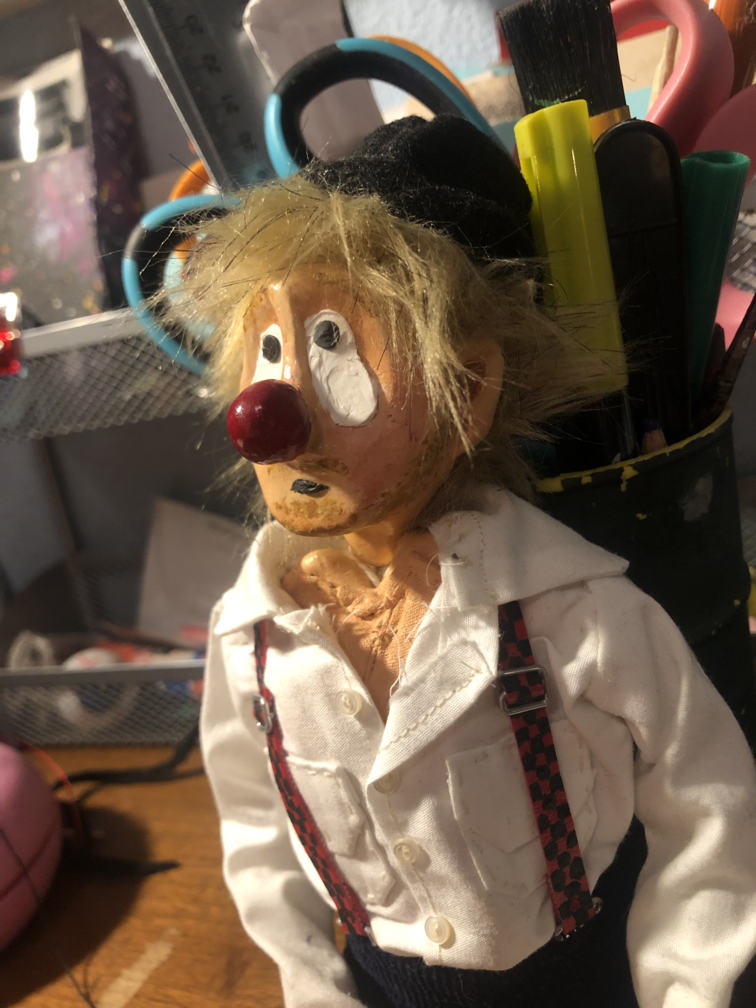
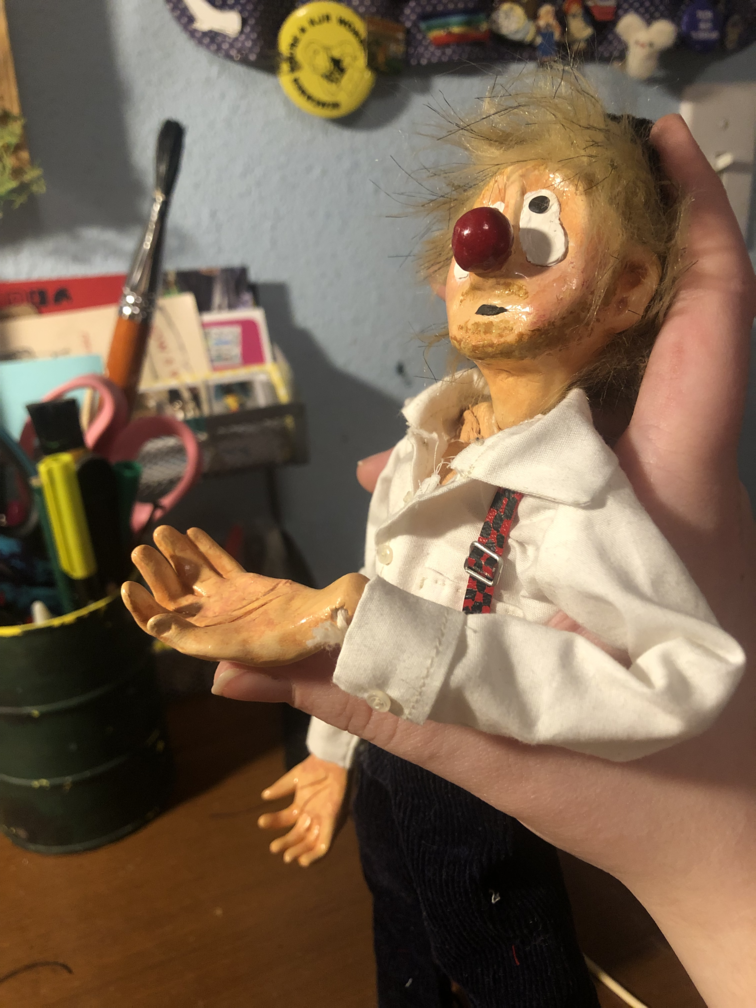
To begin, I sculpted the head. I gave him a large clown nose, and wanted the rest of the features to be rounded to match. Since I had the oven heated up, I made some beads and joint segments as well.

Head prepared to bake

Head prepared to bake

Head and joint beads prepared to bake
May 6th
Next I scultped the head and the new collarbone piece. I re-designed it from how I had sculpted the same piece on Jack. On Jack's collar, the shoulder beads were separate, and it was difficult to connect them to the body after the collar had been sewn in, even once connected they were too low. For Job, I combined these different pieces together, which allowed the arms to connect directly to the shoulers without an extra bead in there. Now with the shoulders all one piece, they were set higher up as well.
My method of sewing the body on using small holes in the clay worked well, as did the method of attaching the head. So these two techniques carried on to the new design.

Jack's collarbone and shoulder beads

Job's collarbone - all one piece
May 7th
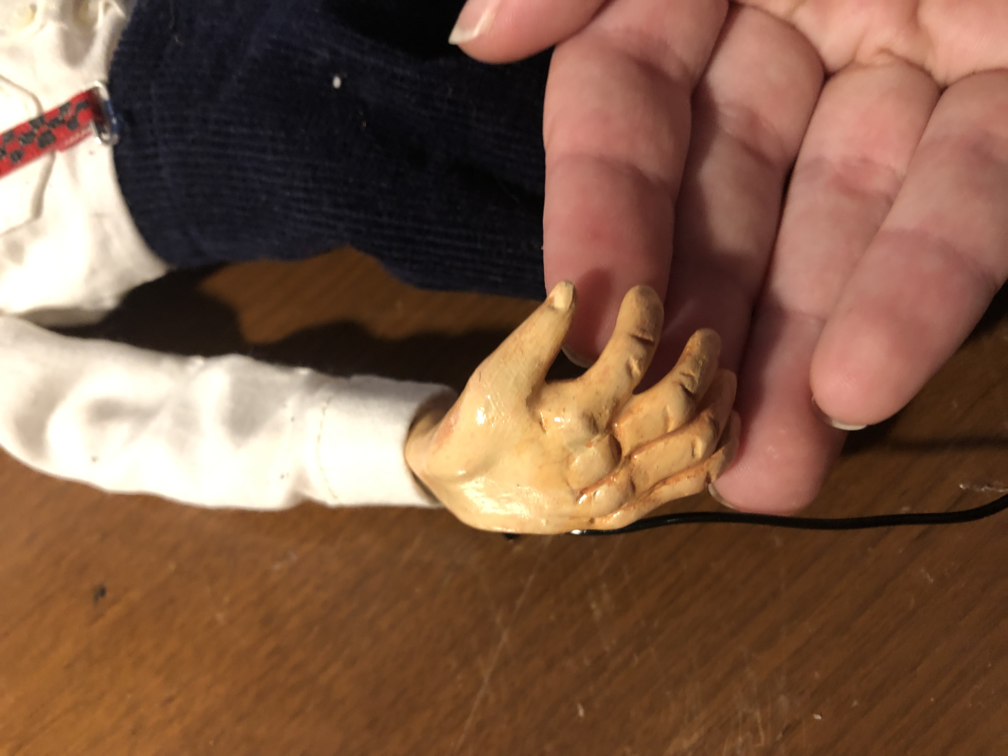
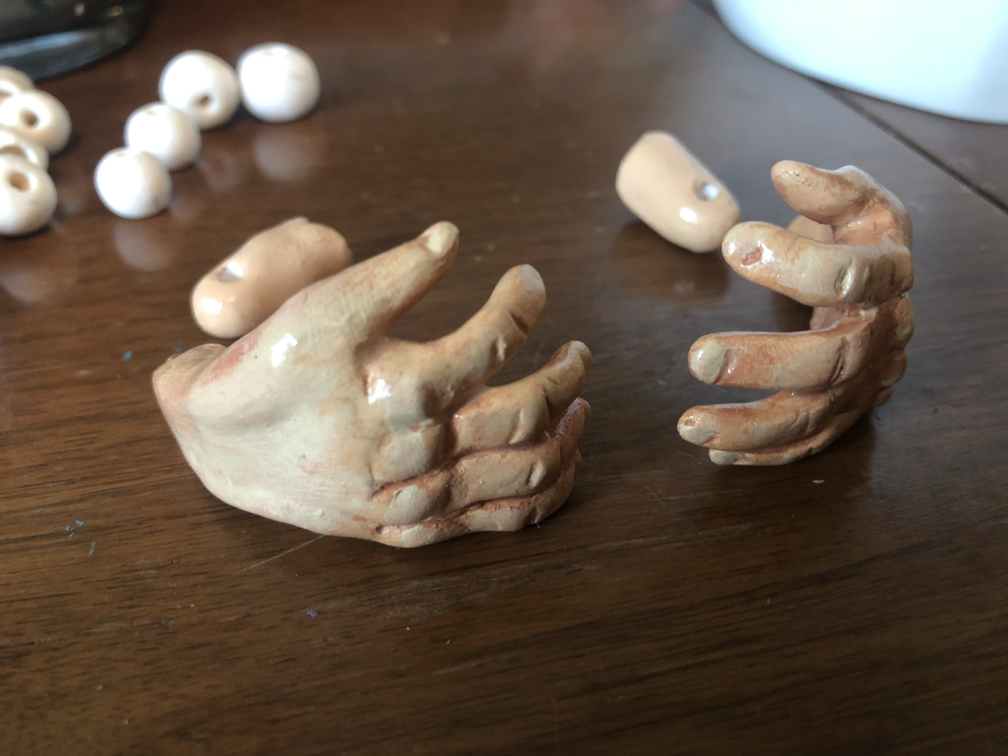
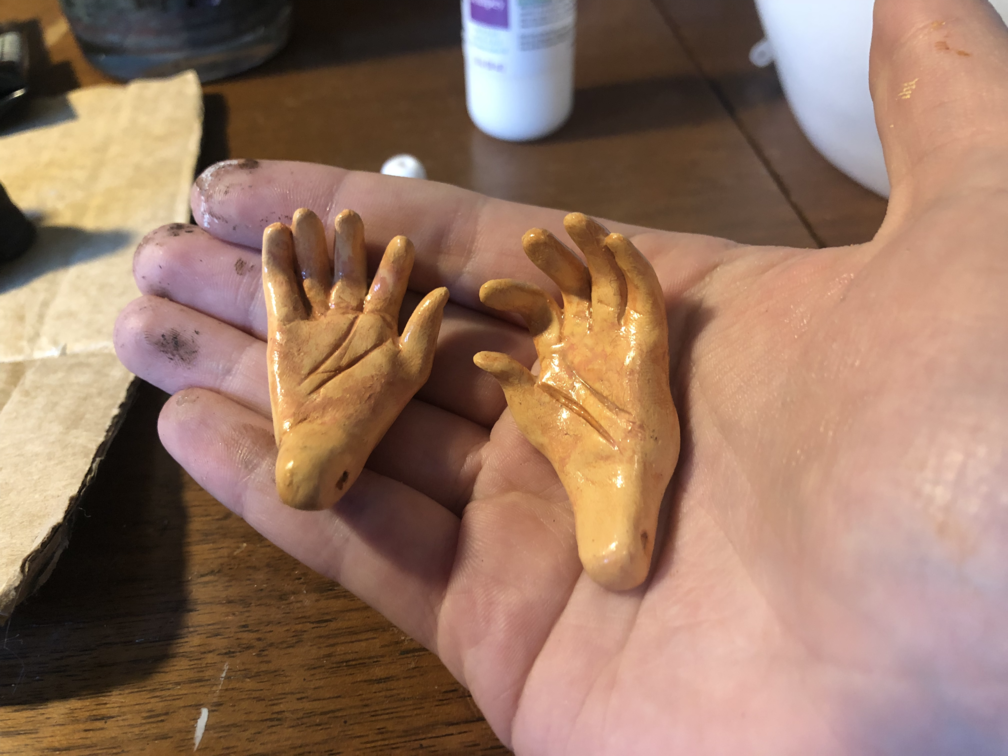
Next I sculpted the rest of the detailed pieces: the hands and shoes. With all the sections finished and baked, it was time for painting. I spent a lot of time building up multiple coats of tans, browns, and pinks to create realistic skin tone on his hands and face. After painting, the clay pieces were sealed with a paint-on clay varnish.

Early layers of tan and pink

Finished varnished pieces
Finished varnished pieces
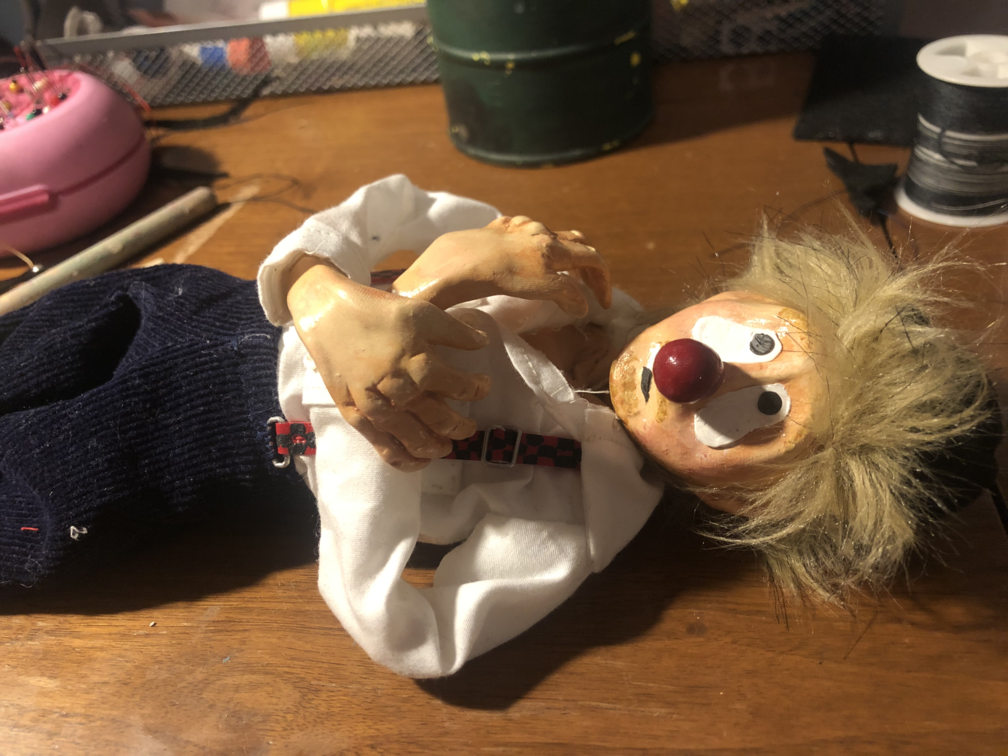
Useing some faux fur fabric from my collection, I glued a small folded strip along his hairline to make a clean edge. For the back of his head, I cut a single large piece into a circle and glued it in place.

Hair option one
Hair option two
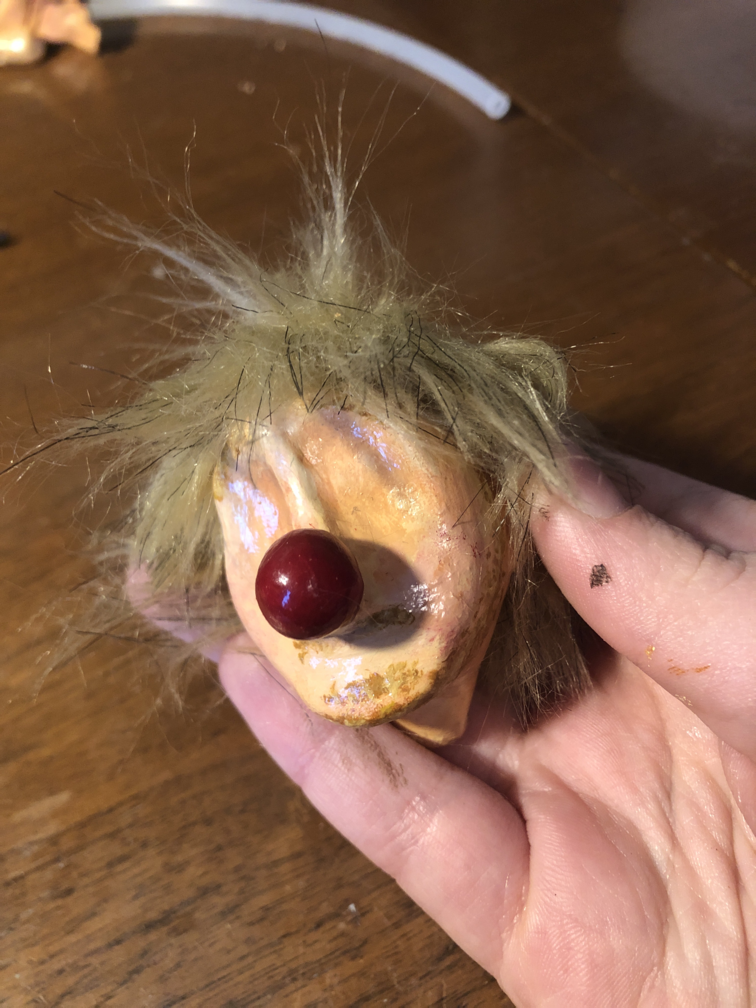
Finished hair (I went with option one)
May 8th
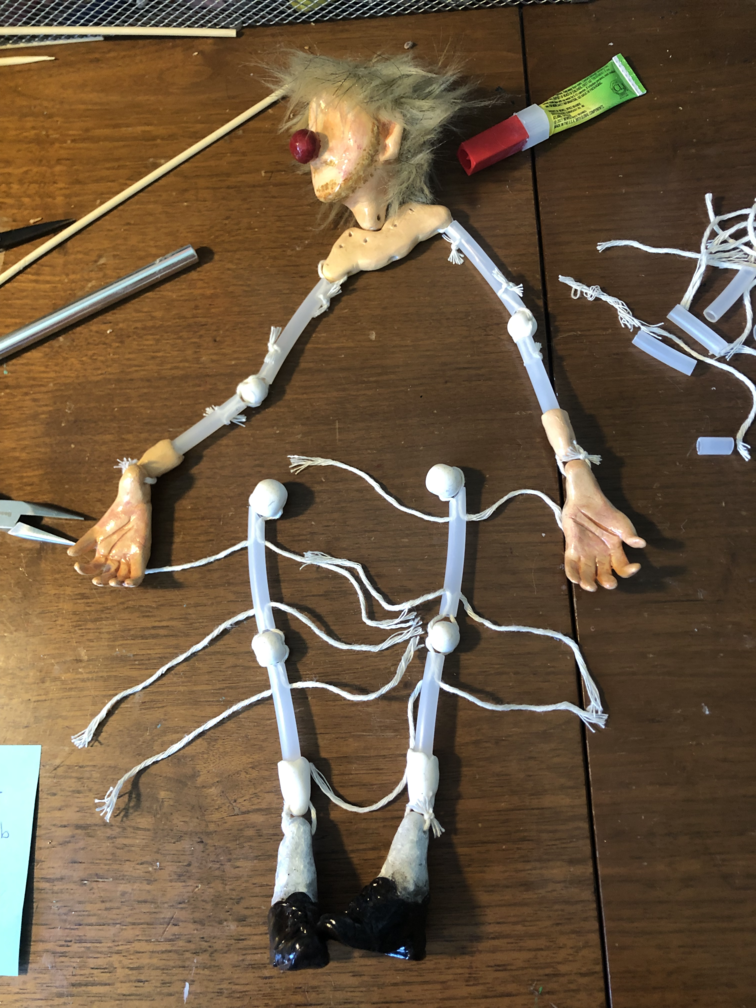
Today I began with stringing the limbs together. For a more in-depth look at the process here, check out my Jack puppet page. I used the same body pattern I had created for Jack, only widening it slightly since this character is larger.

Laying out all the sections
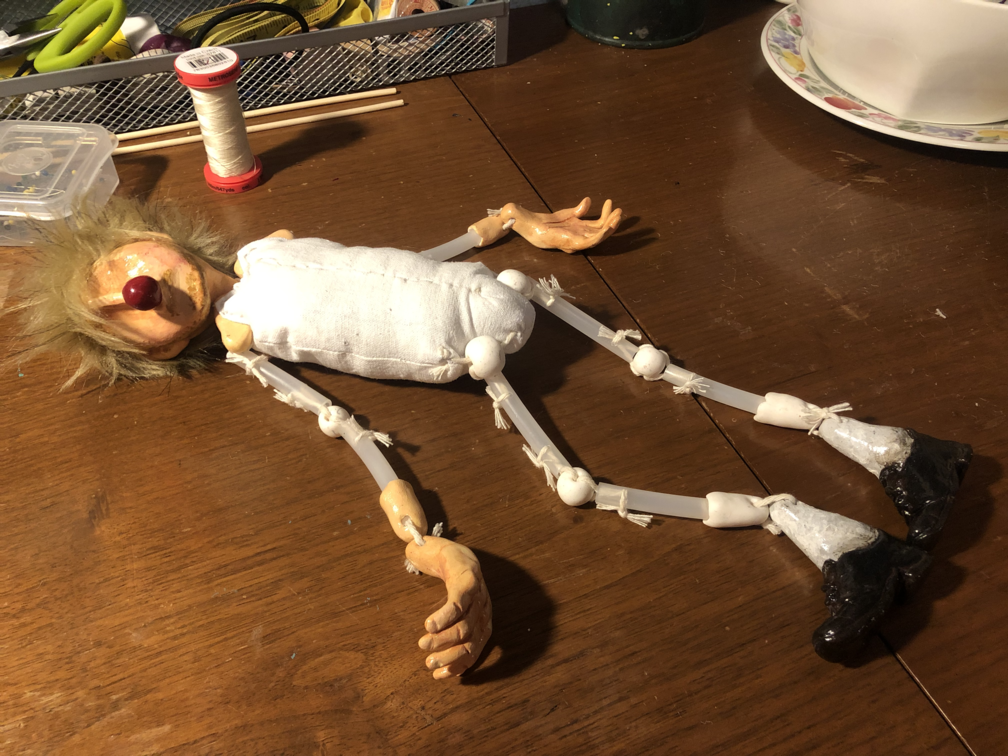
Joints strung, legs still untied
Caption
Since his shirt would be slightly open, I painted his chest the same color as the clay pieces.

At this point, I have made so many simple button-up collared shirts for my dolls, the process is very streamlined. However, I still misjudged the sizing on my first attempt at his shirt, and decided to set it aside to re-try in the morning.
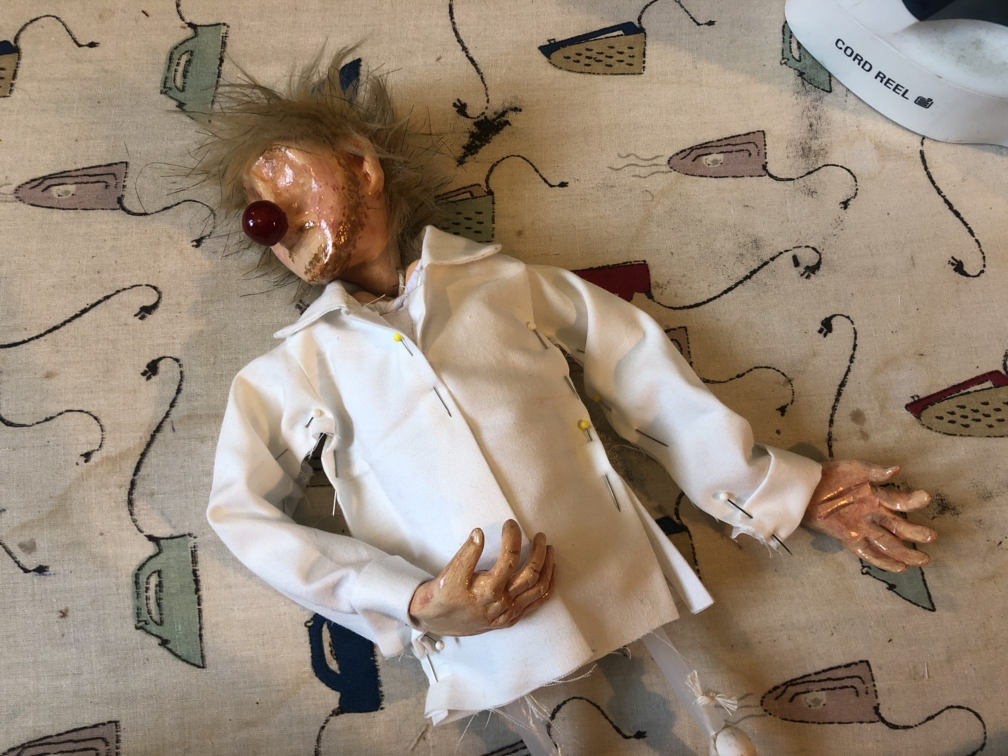
I got all the way to the last pin test before realizing the sizing issue
May 9th
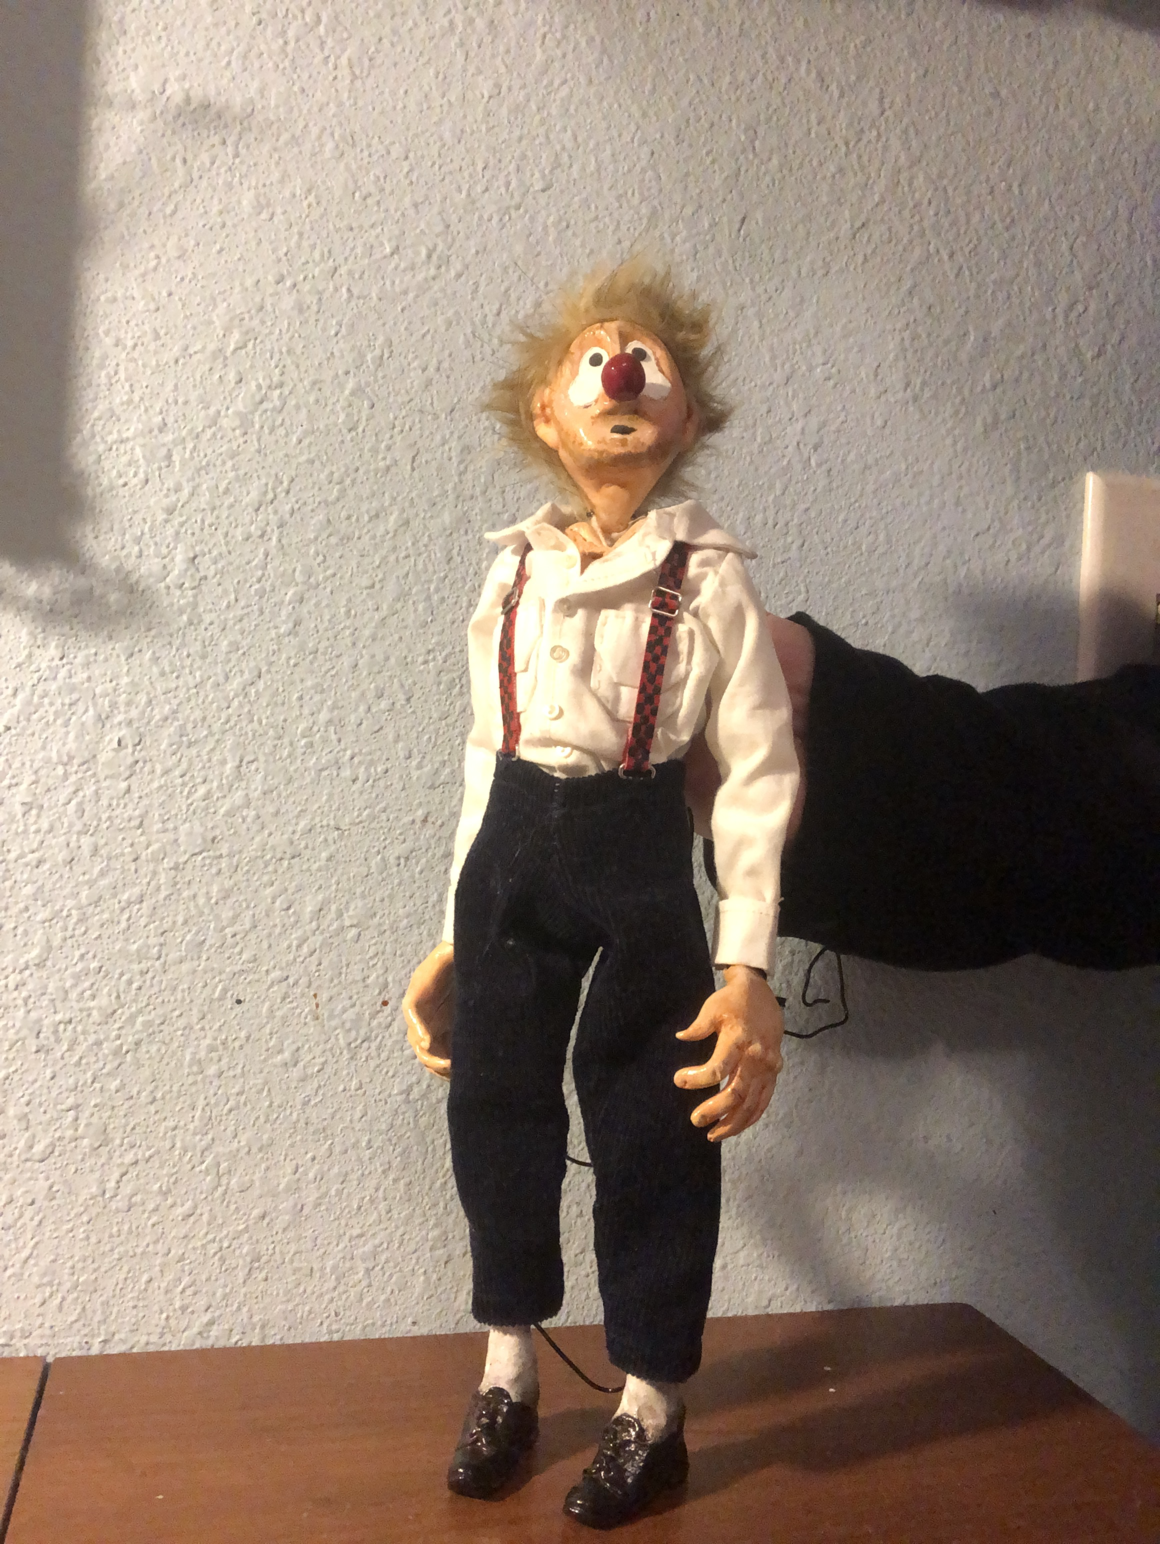
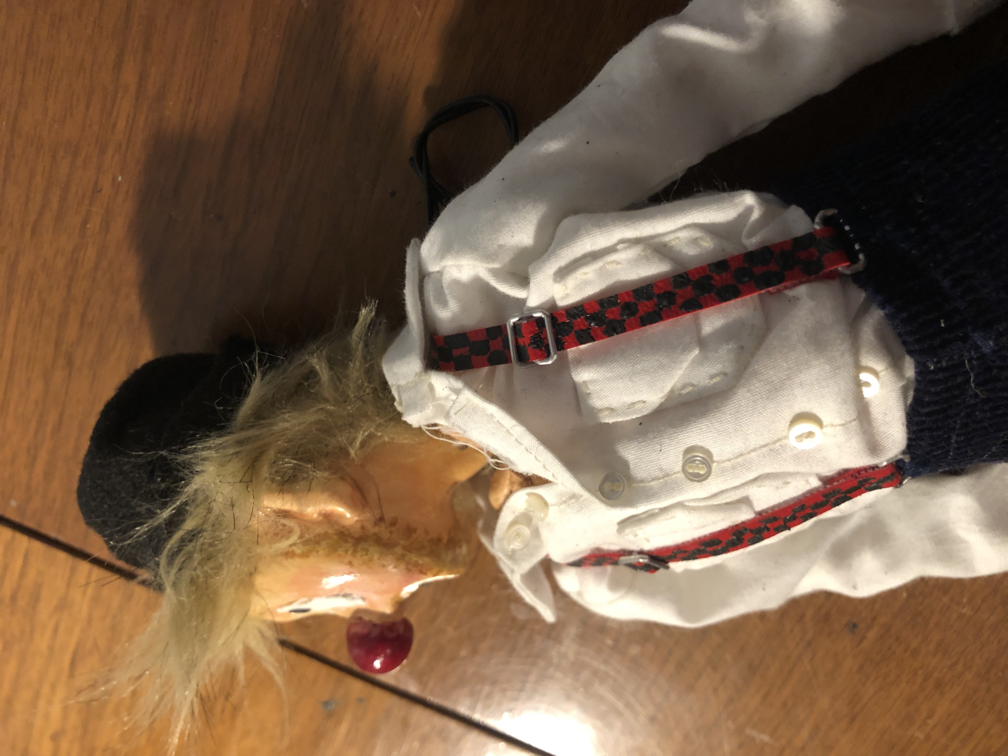
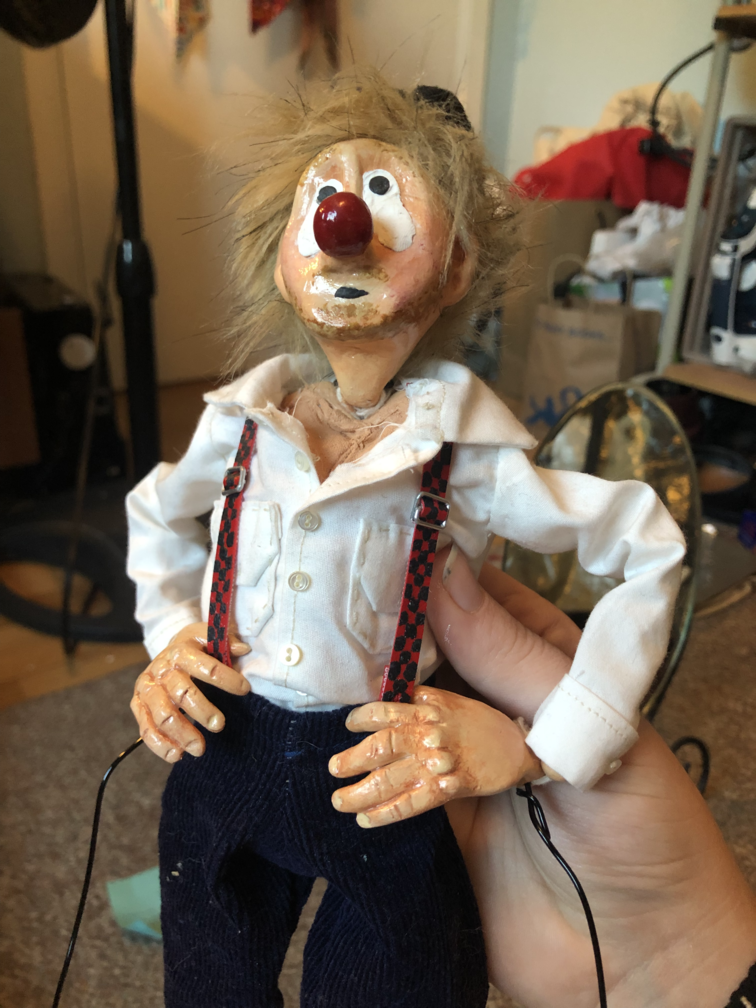
It was time to re-make the shirt, this time slightly bigger (which, as it turned out, made it exactly as big as my initial measurements that I had earlier judged too large). It fit perfectly. Looking closely at my reference image, I saw he had two covered pockets on the front. Ever dedicated to accuracy, I mesured out and sewed down these tiny patches to emulate them. Similarly to how I made Jack's costume, I sewed the two front panels together first, then attached the shirt together along the sides and sleeves. His hands are too large to fit through such small sleeves, and anything larger would show the bones of the puppet. I added buttons to the front of his shirt, and to the backs of his cuffs as well.
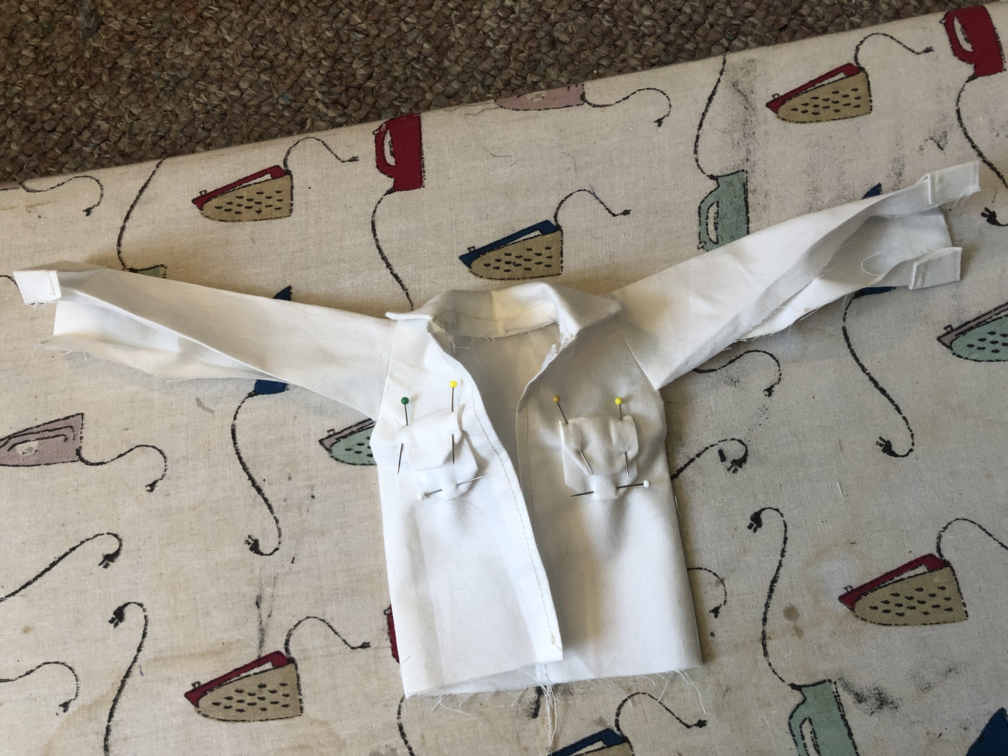
Second shirt attempt
The one photo I'm referencing is from the waist up, so for his pants I had to make my own decision on color and style. I found some thin, dakr blue corduroy and decided it was neutral enough and went well with the rest of his clothes. I used the same pants pattern from both Brúni and Jack.

For his suspenders, I cut strips of red vinyl and painted them with black checks. I used scraps of wire to create their buckles on the front and back.
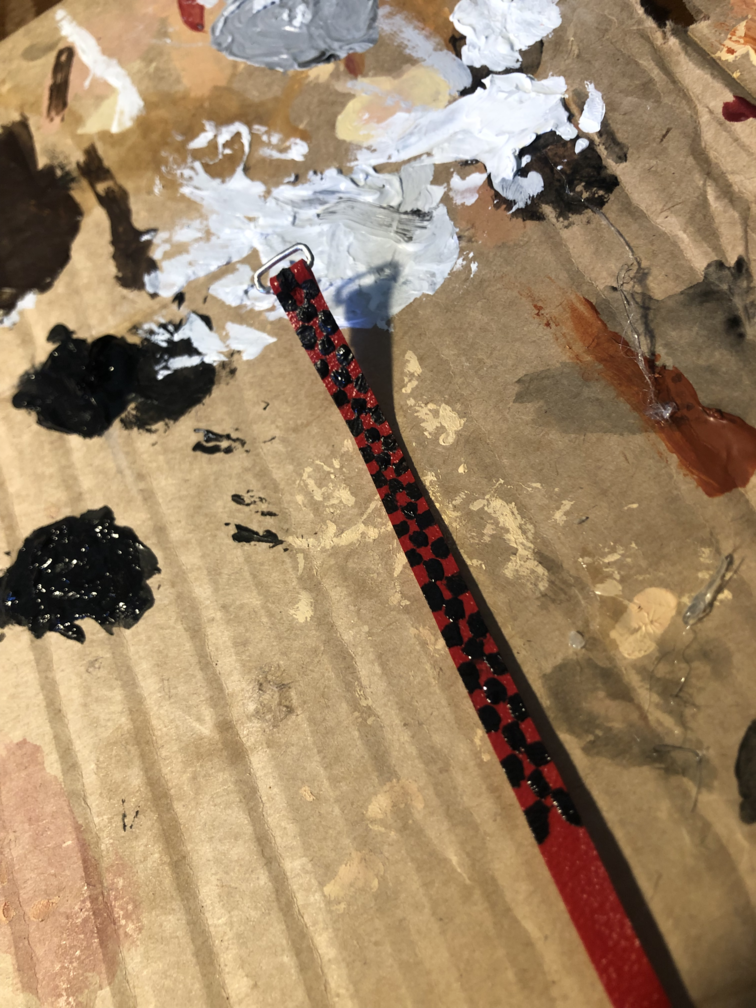
Painting one of the suspenders
Sewn on via the buckles
I also made his hat from felt! It's just a rectangle sewn into a tube, with the top rounded off. I steamed and stretched the brim to get it to stay, and sewed it down to the fabric of his hair.
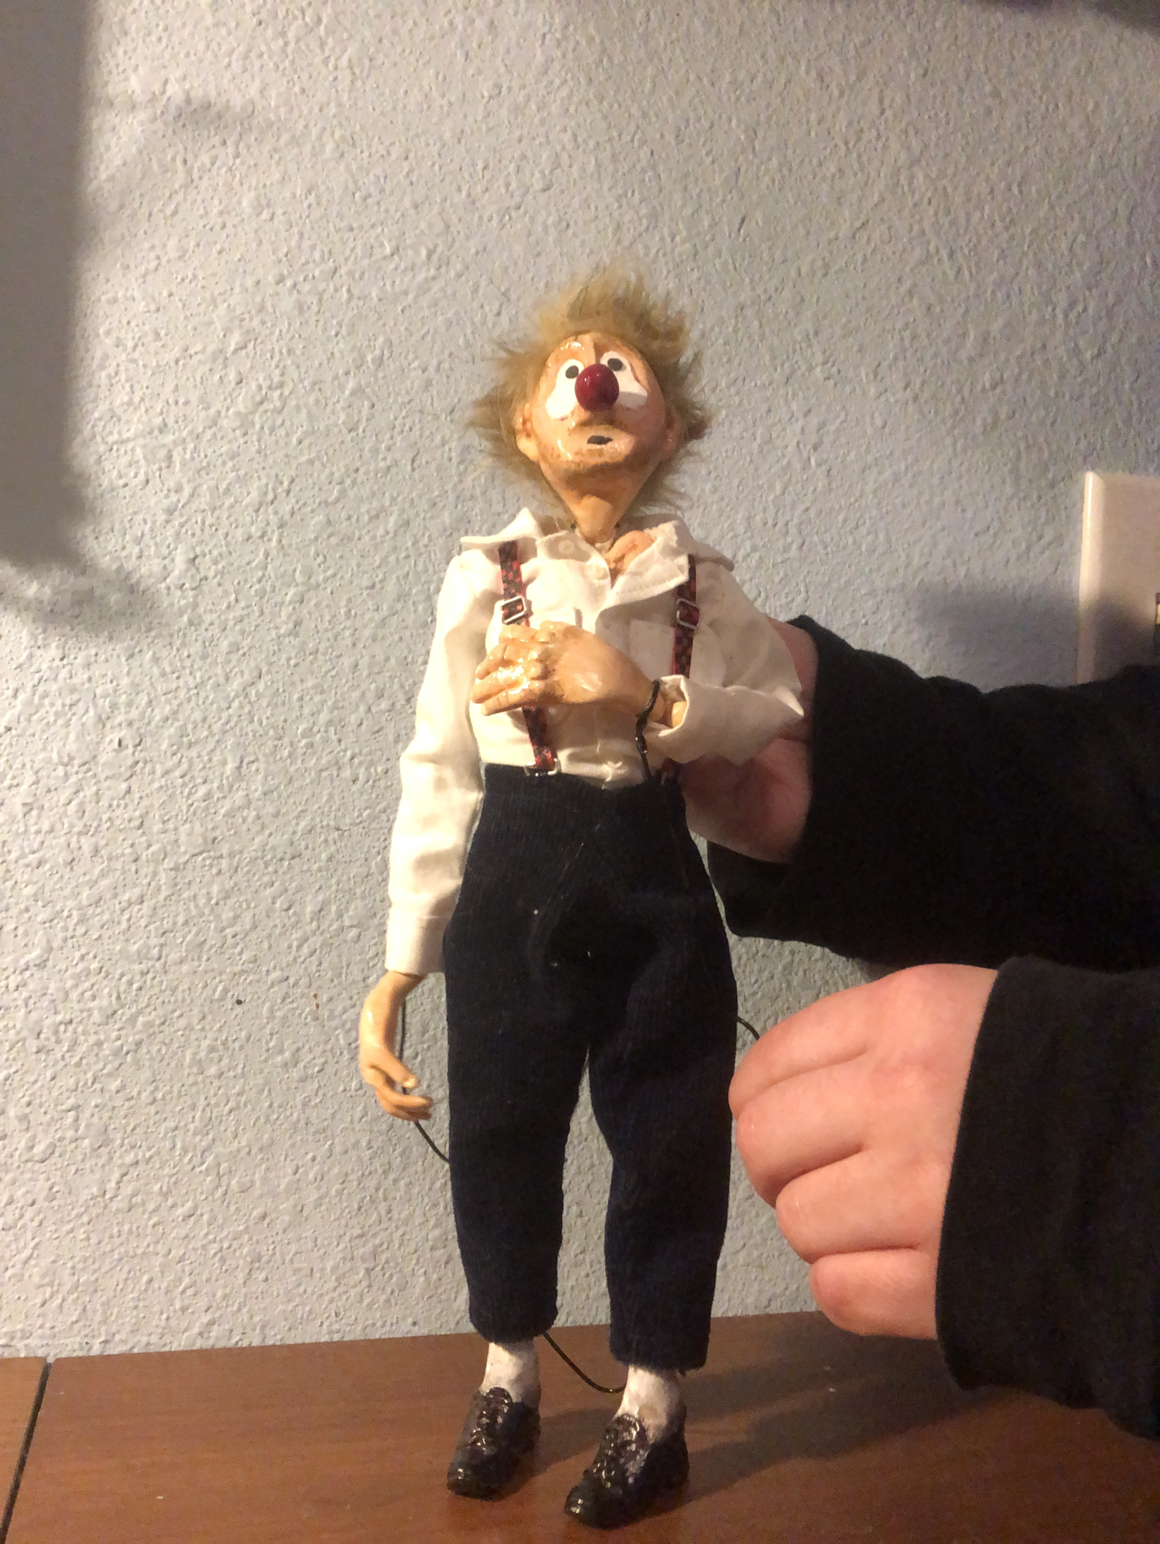
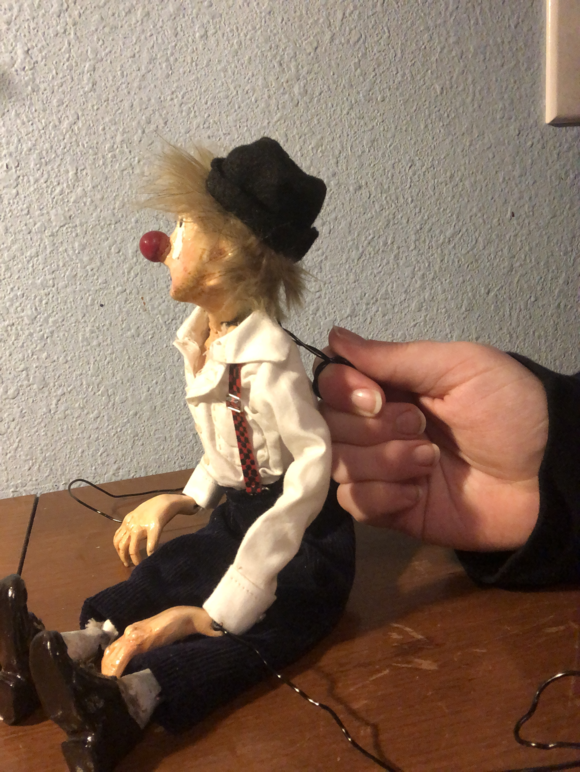
His eyes are made of polymer clay, which stays malleable until baked. This allows the expression to be carefully wiped off and changed.
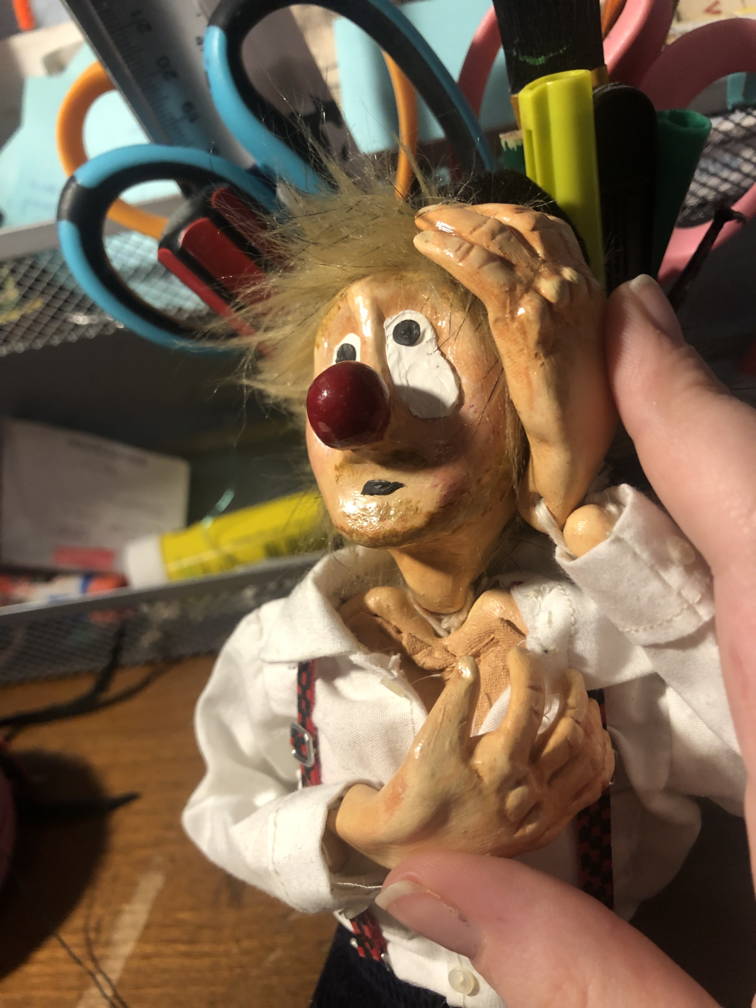
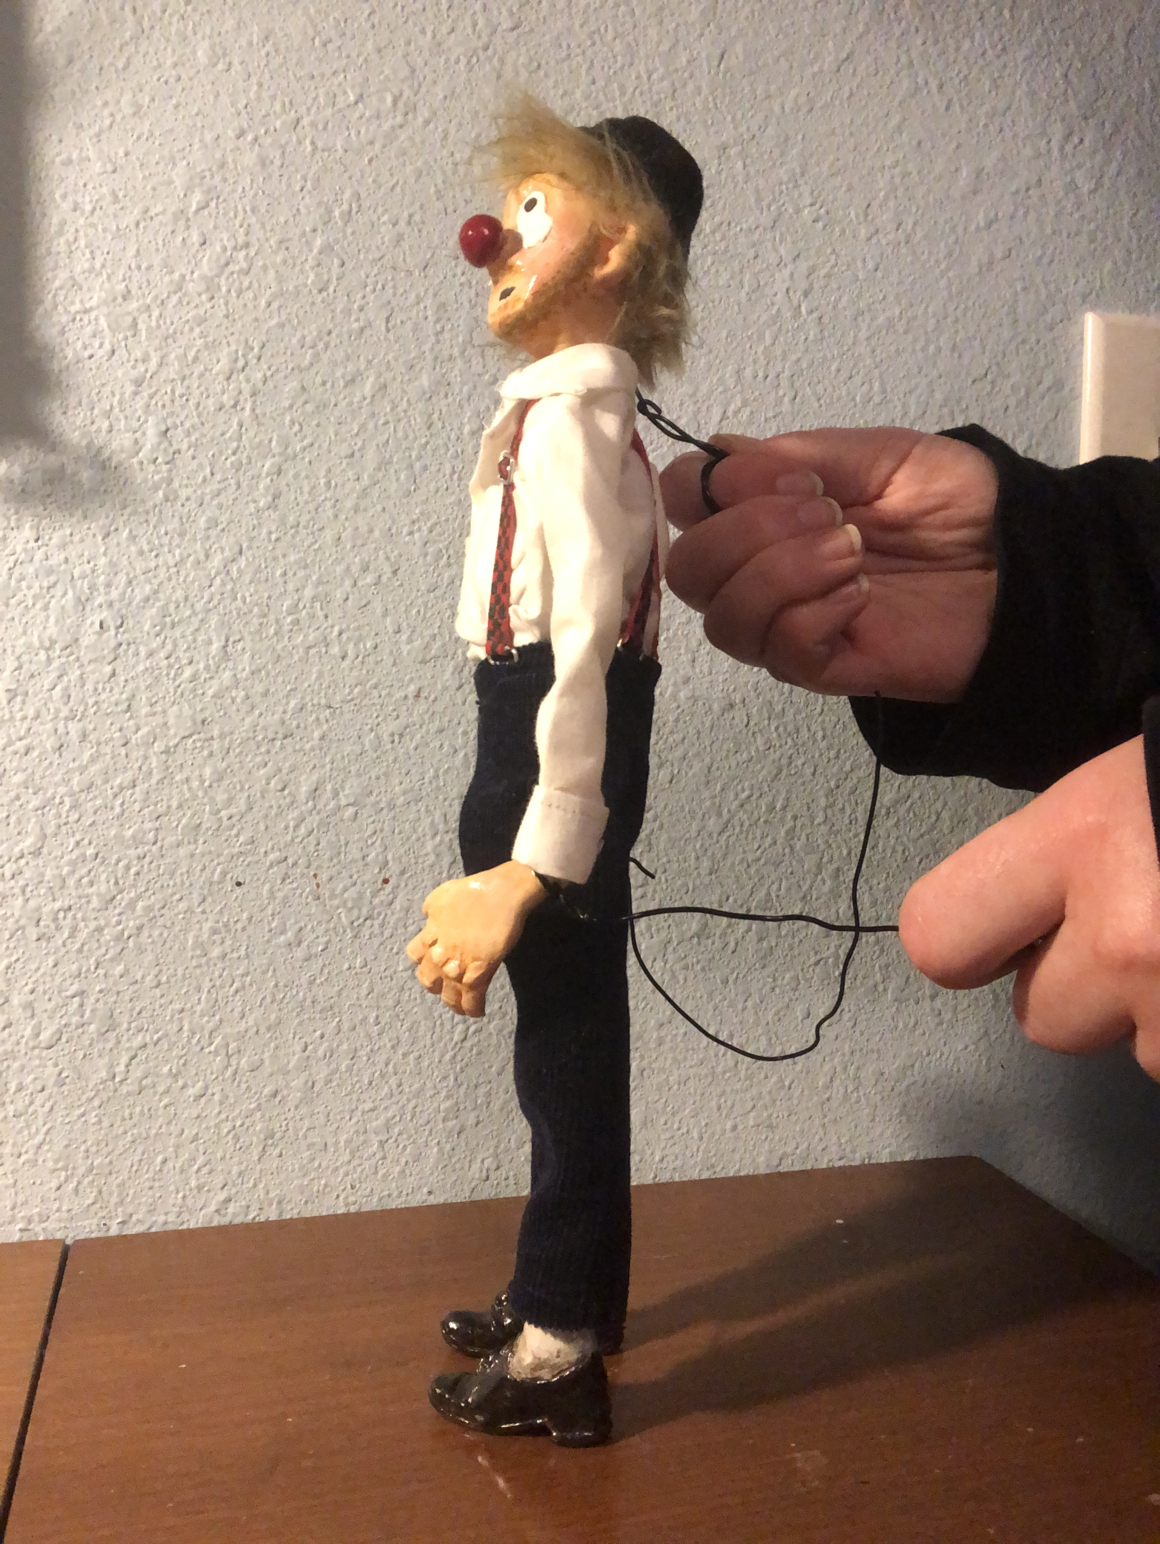
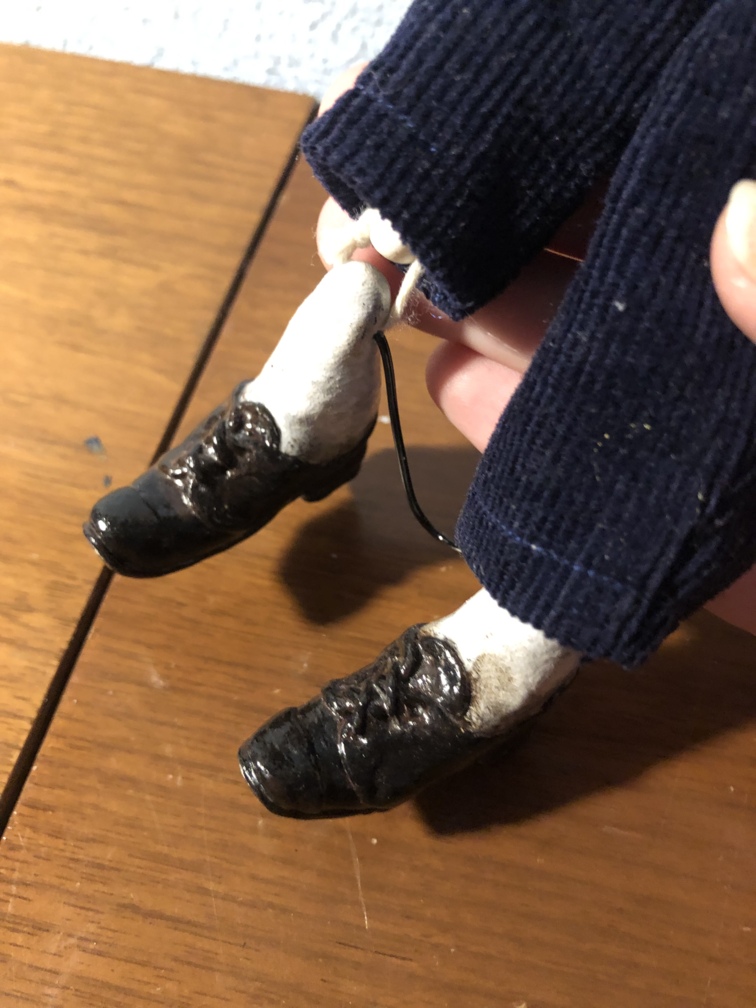
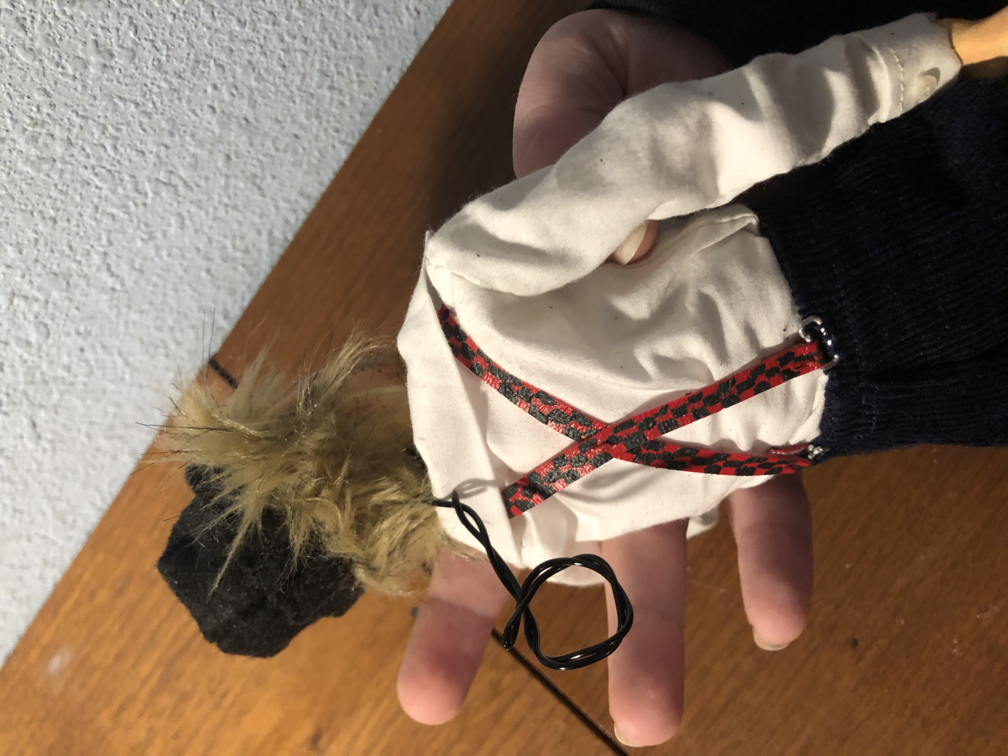
Next, he needed his arm and head wires. His arm wires are poked through the same holes in the wrists that the twine threads through. It wraps around the back of the hand and is glued in place so they don't twist.
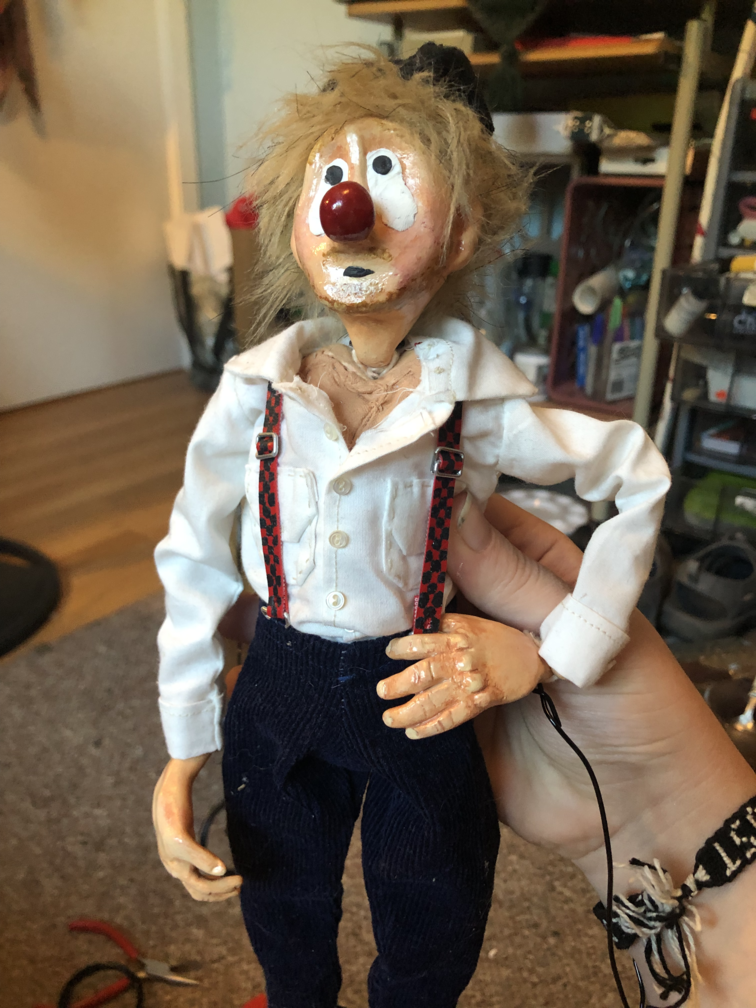
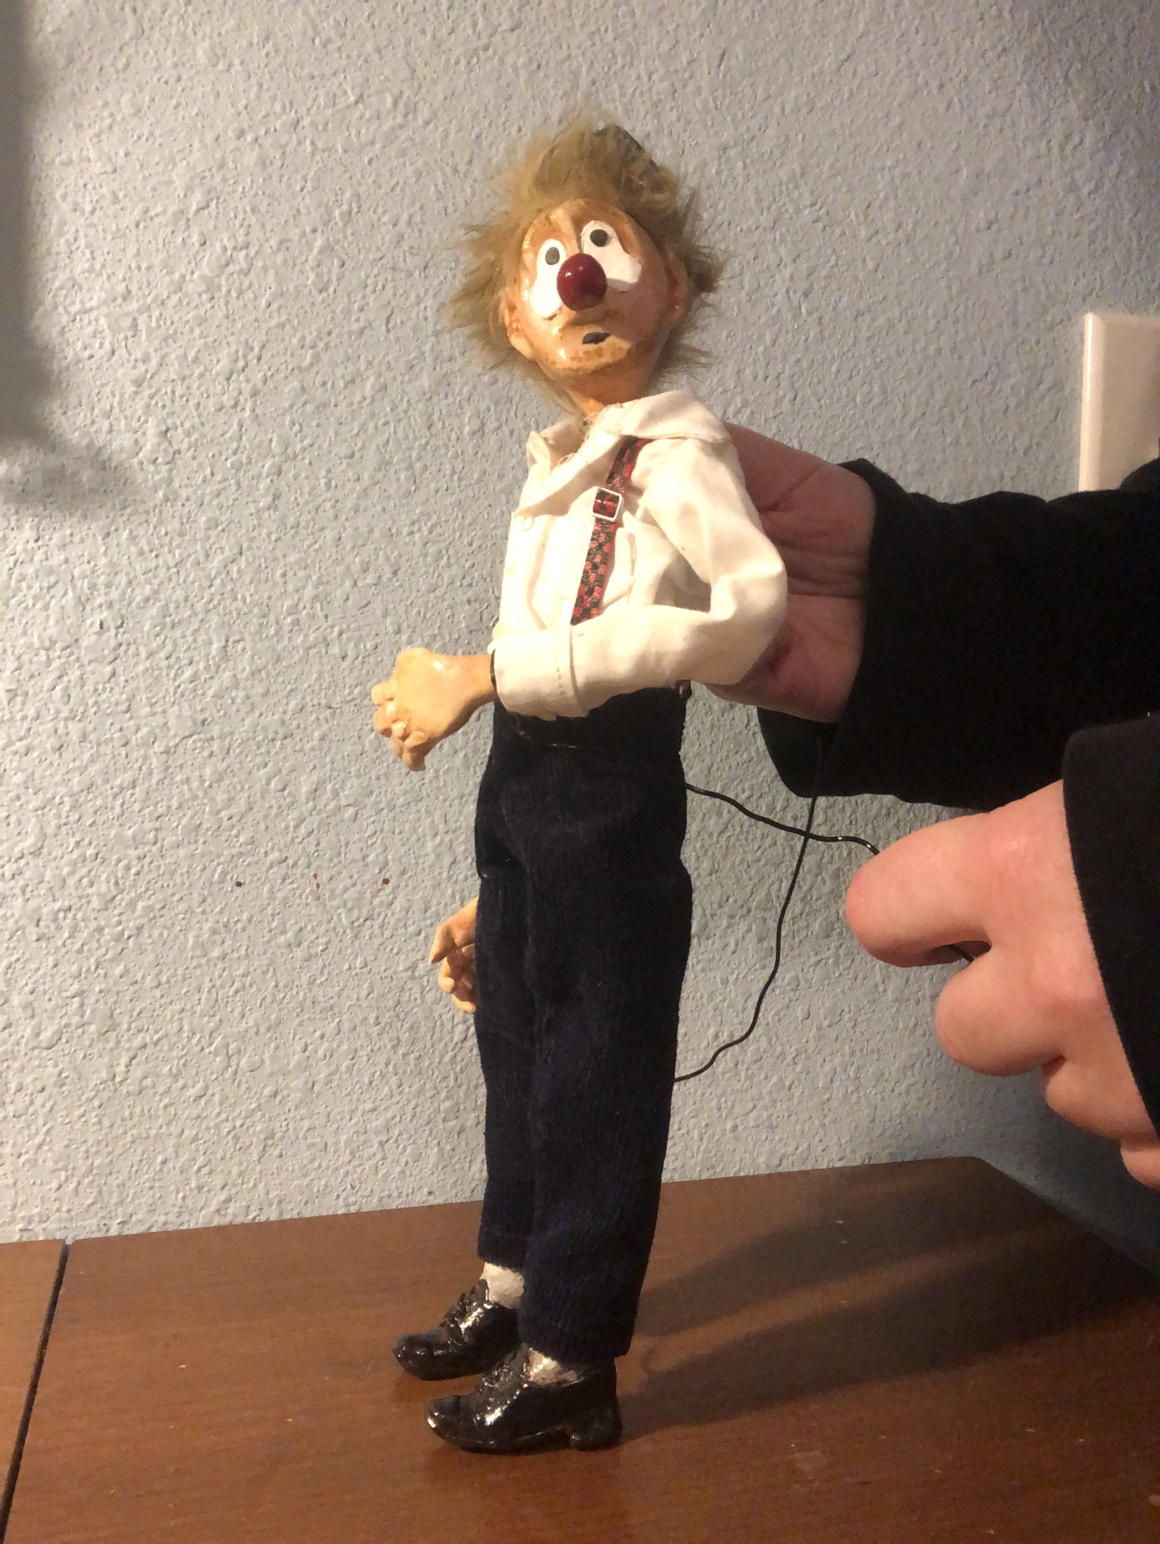
A fun discovery: his thumbs can tuck into his suspenders and keep his arm in place
Both thumbs
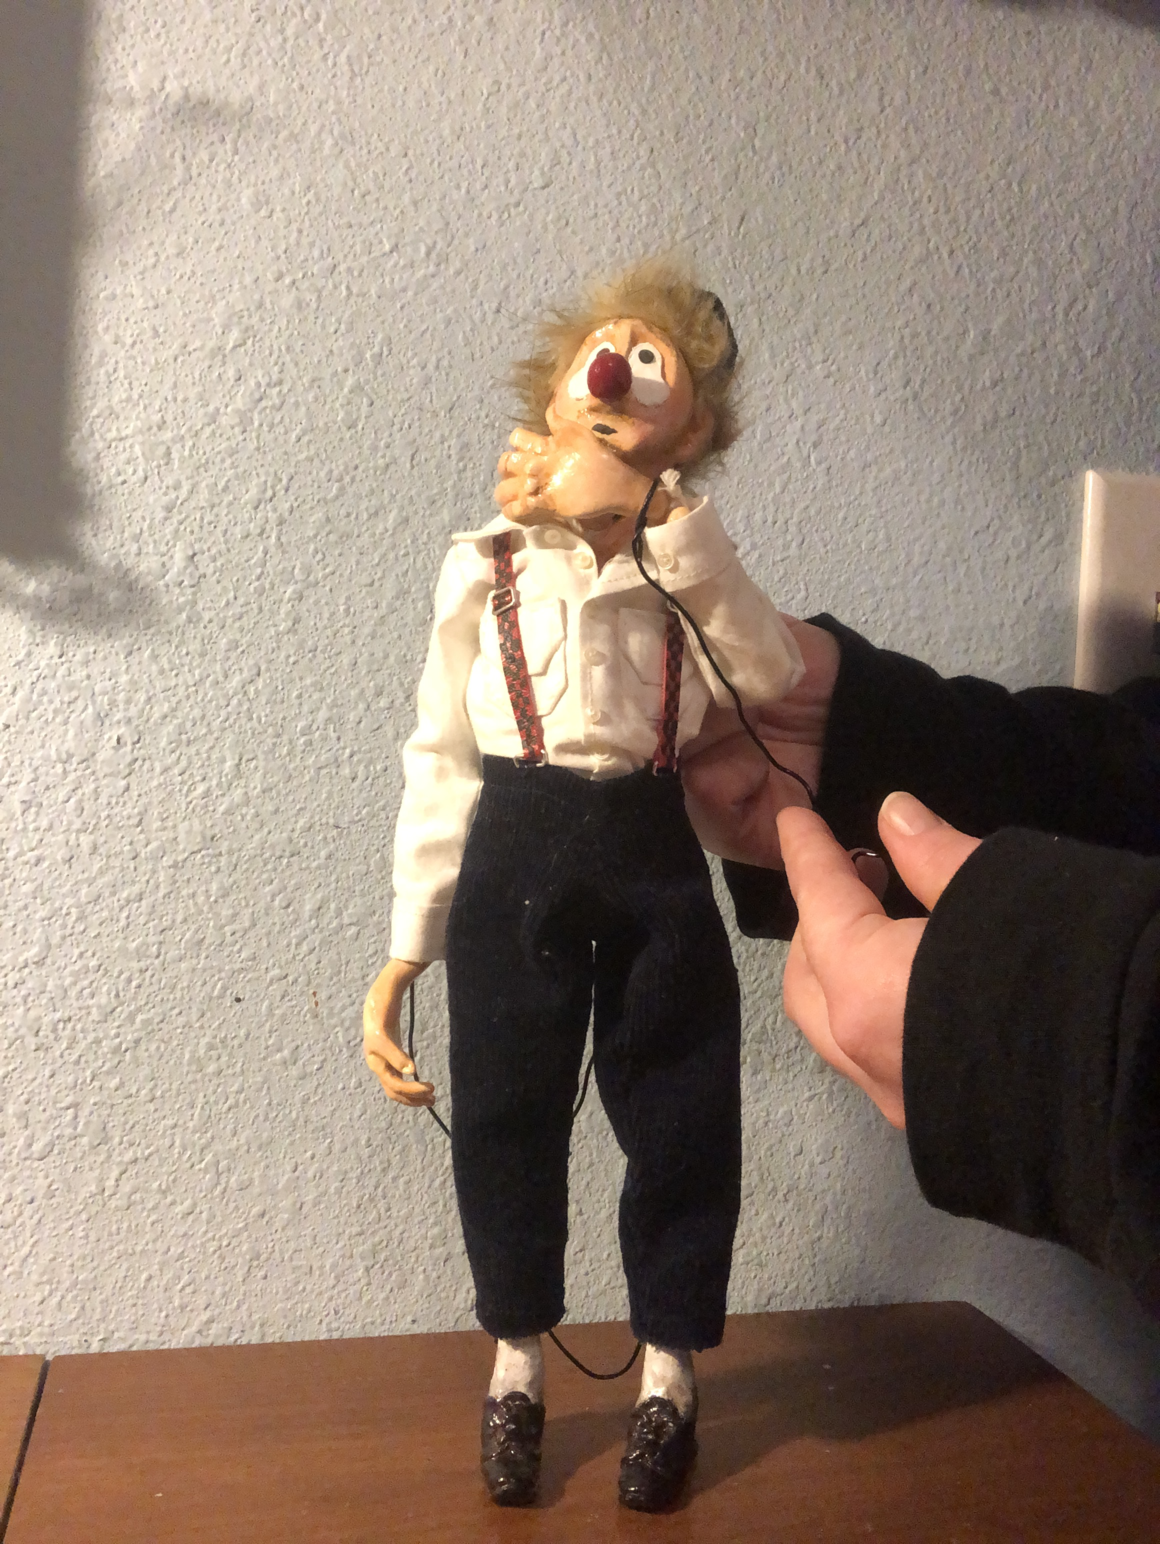
The head wire is attached similarly, through the hole in the neck. This was a little harder to push through since there are two pices of thread that go through this same hole, which made getting the wire through his neck feel rather violent. The two ends of the wire were twisted together and glued in place.

Poking the wire through

Ends twisted to create the handle
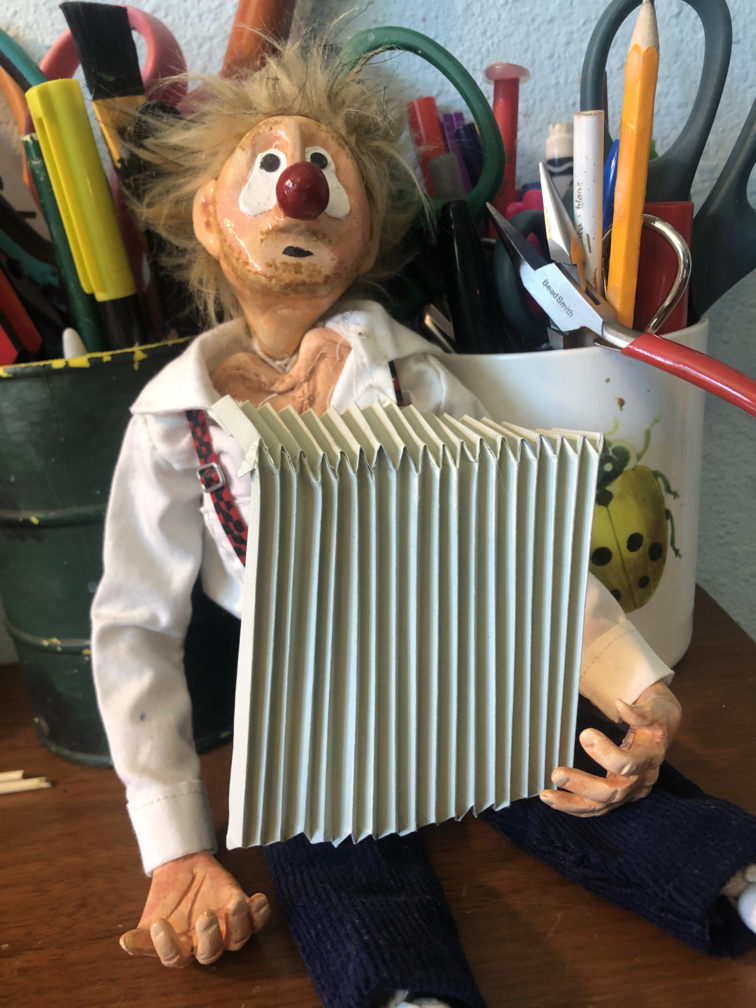
Accordion Process
May 10th
Today I started on his accordion. I used this tutorial by Mo Clay, which is absolutely exactly what I was looking for!
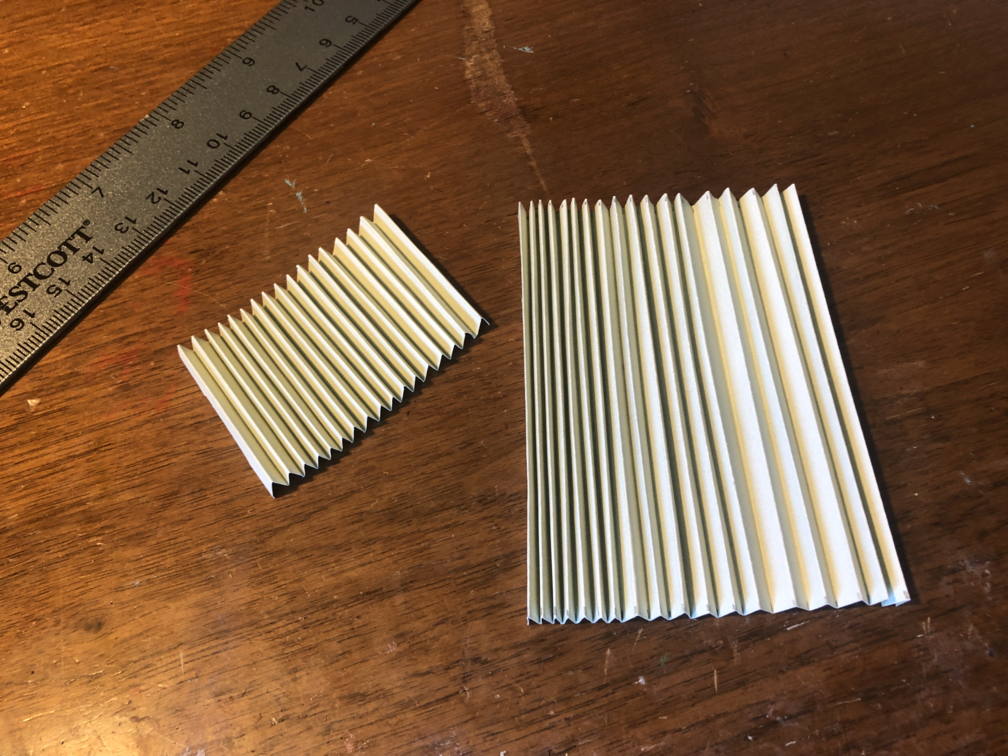
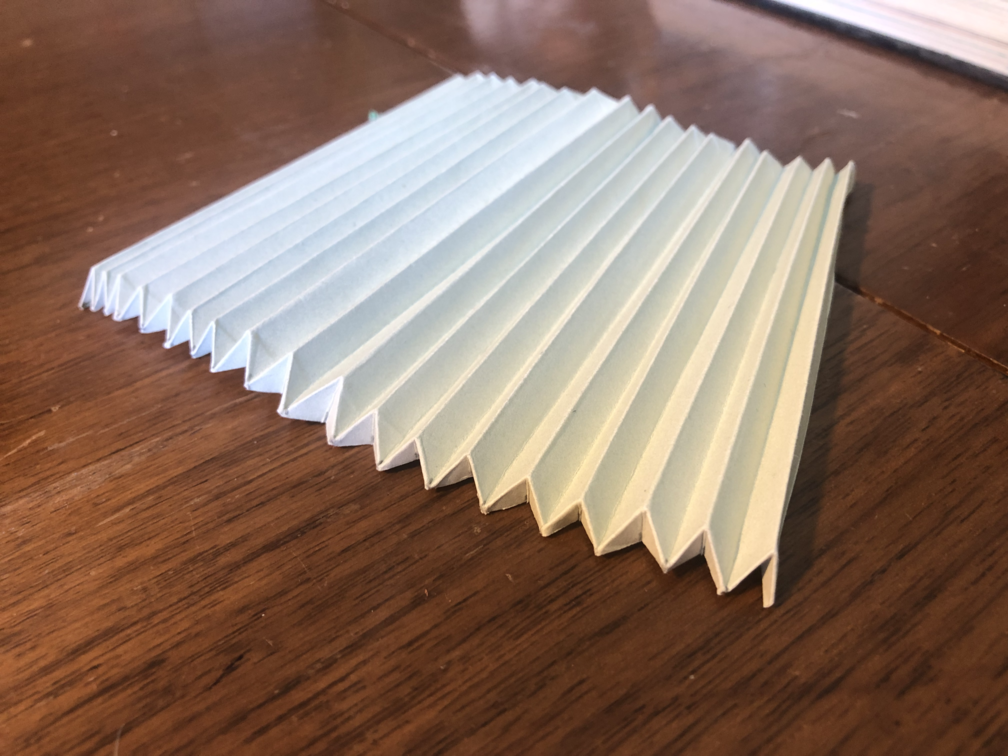
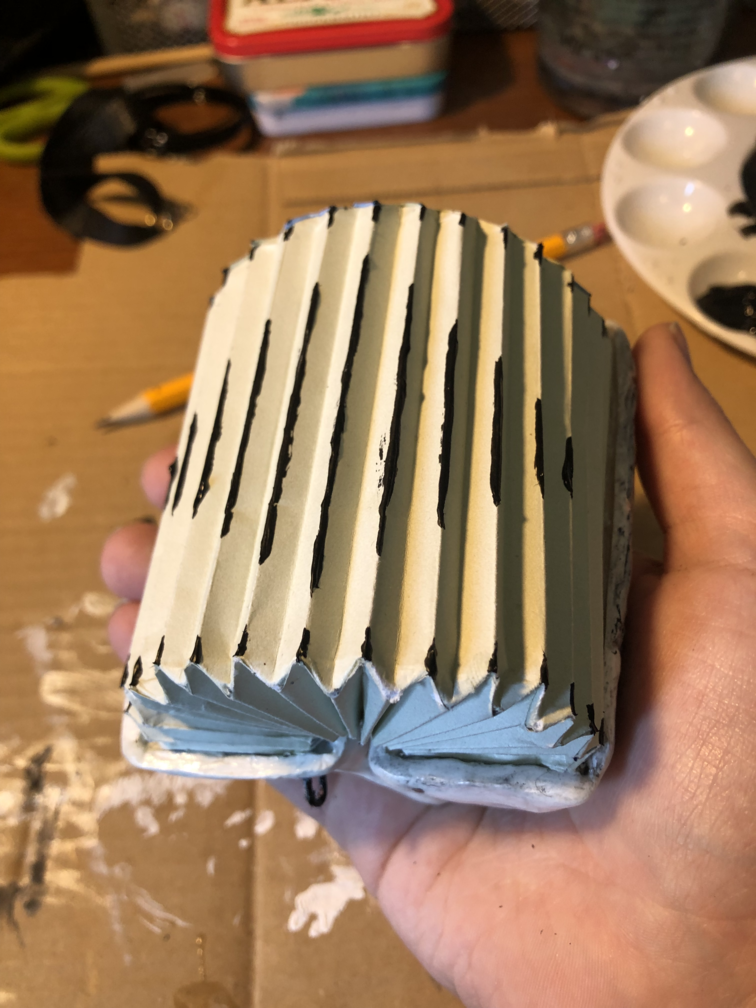
The first step was deciding how big I wanted it to be and cutting my cardstock to size. After making the initial folds (38, I wanted to try to keep the actual count of folds in the real-life accordion, which is 17 visible outer folds which means 19 total outer folds, and 38 folds total. I may need to trim it too short from miscalculating the overlap, though) comes the fun part, attaching the sides together. Following the video, I made a vally fold in each point on either side of the two larger pieces. On the shorter pieces, I cut off the corners at a right angle. The two triangles are meant to fit perfectly together, but since I had made them so wide there was a little struggle with keeping them in place as they dried. I could flatten and clamp the first two corners, but ended up using superglue when attaching the two pieces to each other.
Two folded sides

Paired corners cut on one side, and folded in on the other
Two sides glued
Size comparison with 1/2 glued
All four sides glued

May 12th
With the bellows done, the next day I worked on sculpting the two sides. I decided to start with the smaller left-hand side.

Left side with basic shapes
Left side - front
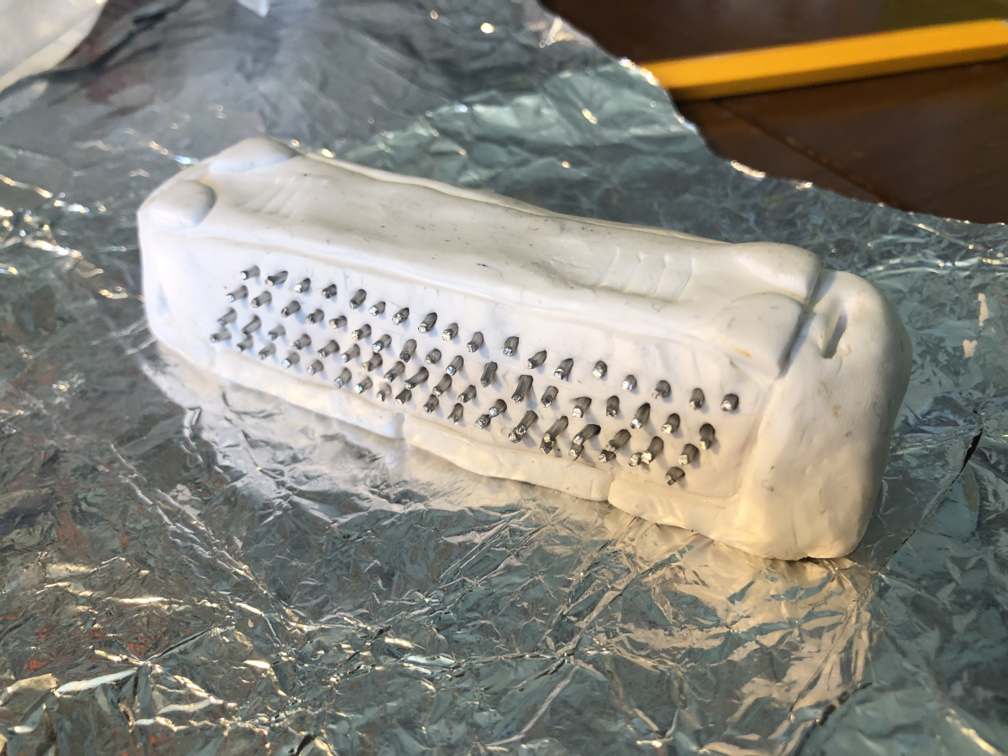
I didn't want the buttons to be merely painted on, I knew I wouldn't like the final look of puarely 2-dimensional buttons. Instead, I experimented with sticking small pieces of wire to create each button. It was time consuming, and at first I wasn't sure if they would stay throghout the baking process.
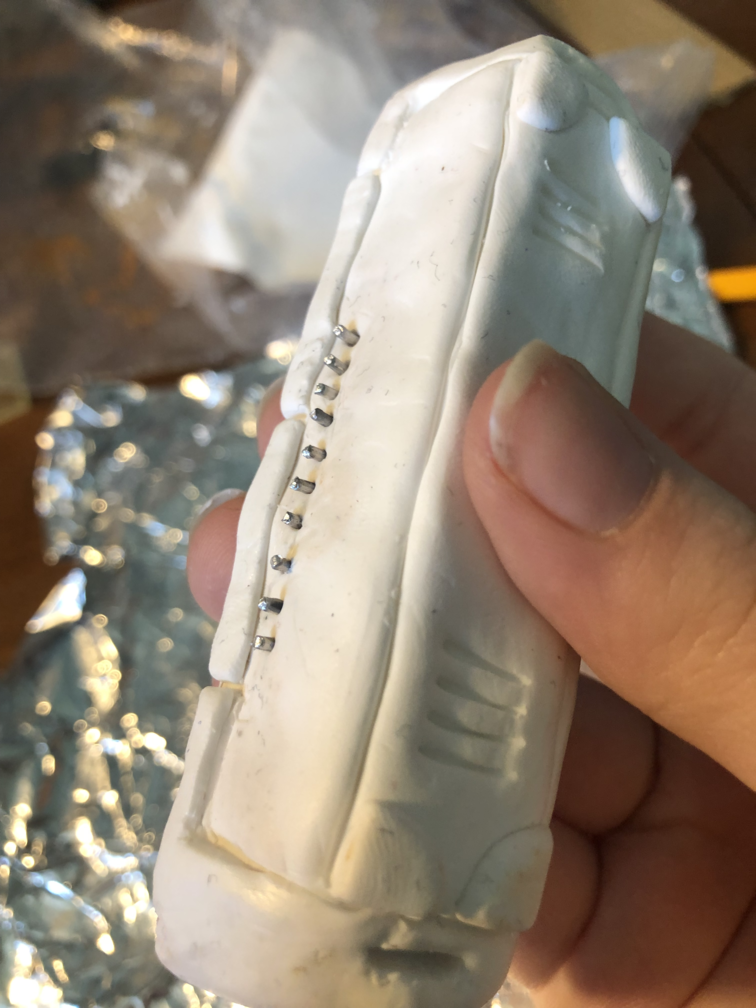
Beginning the buttons

Removing the cardboard that helpd the bellow cavity keep shape
Left-hand side ready to bake
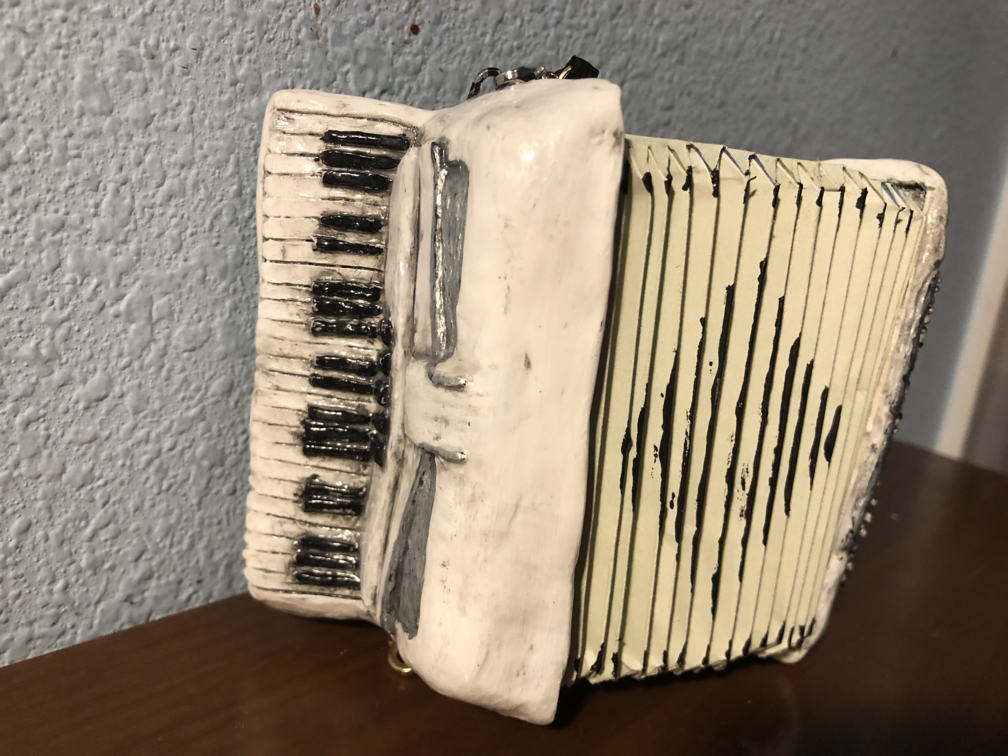
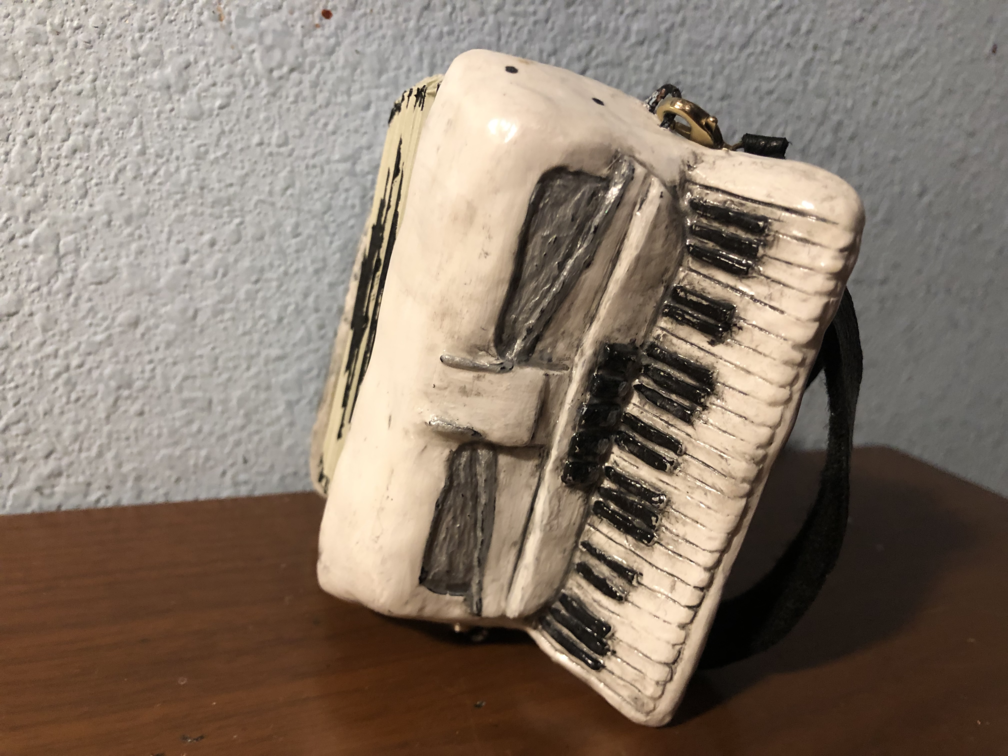
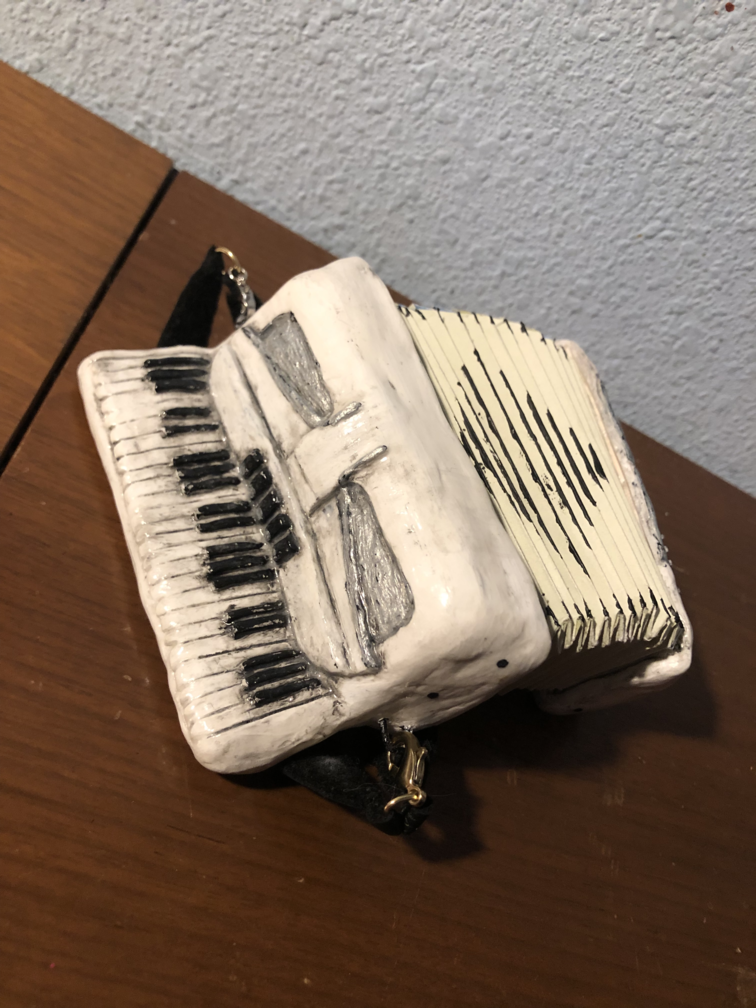
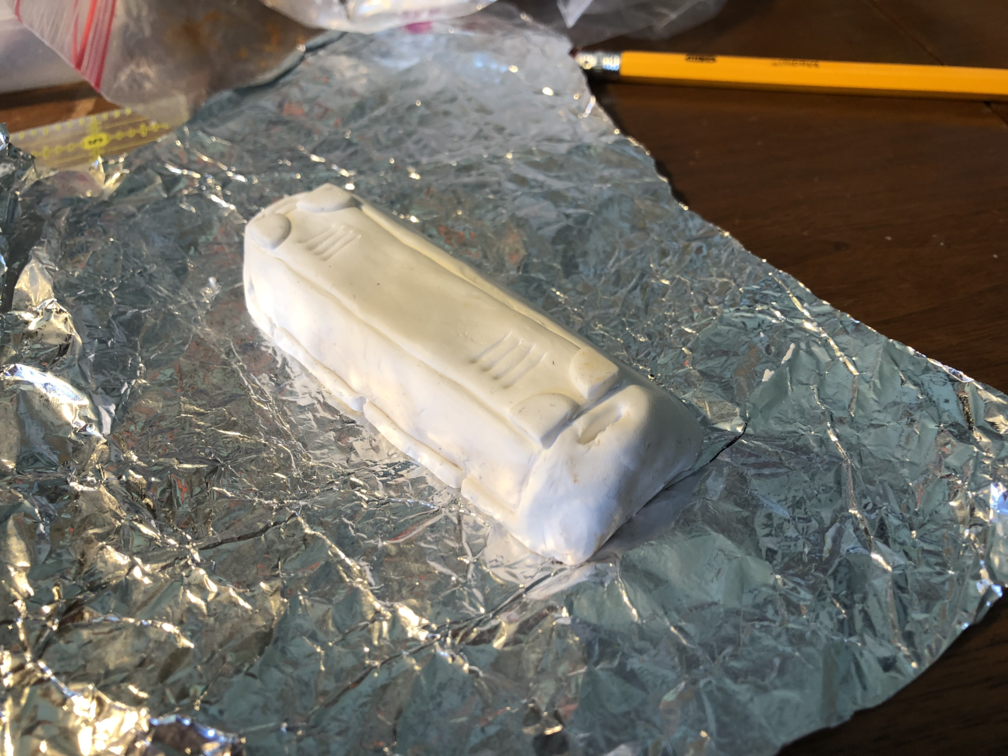
Time to start on the right-hand side, with the keys. I took more time building up the structure of this side, and included small pieces of wire within the tin foil core to strengthen the very skinny keyboard. This was when I realized I needed a place to attach the strap, and stuck a small loop of wire into the top.
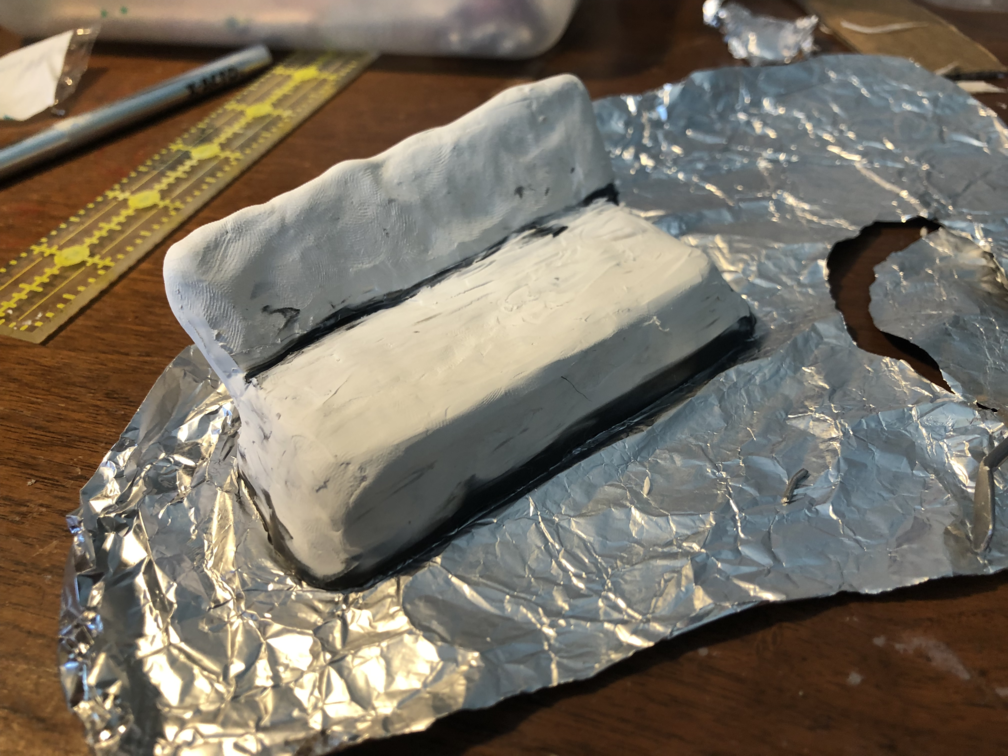
Basic shape

Basic shape - back
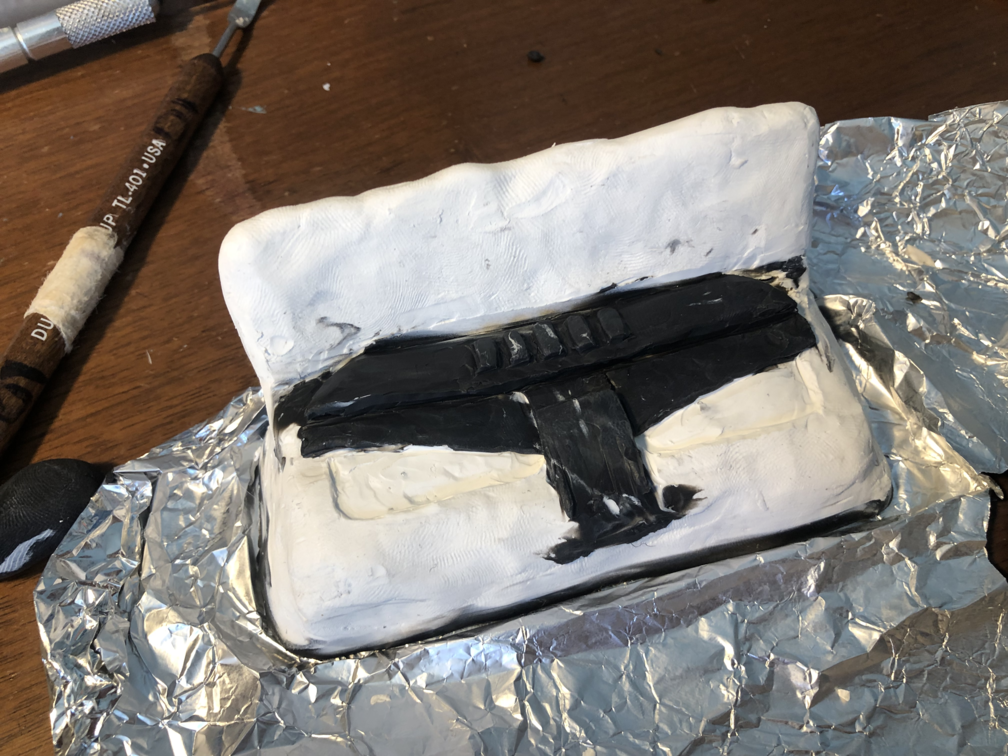
Sculpting some detail, the different colors of clay are just what I had on hand
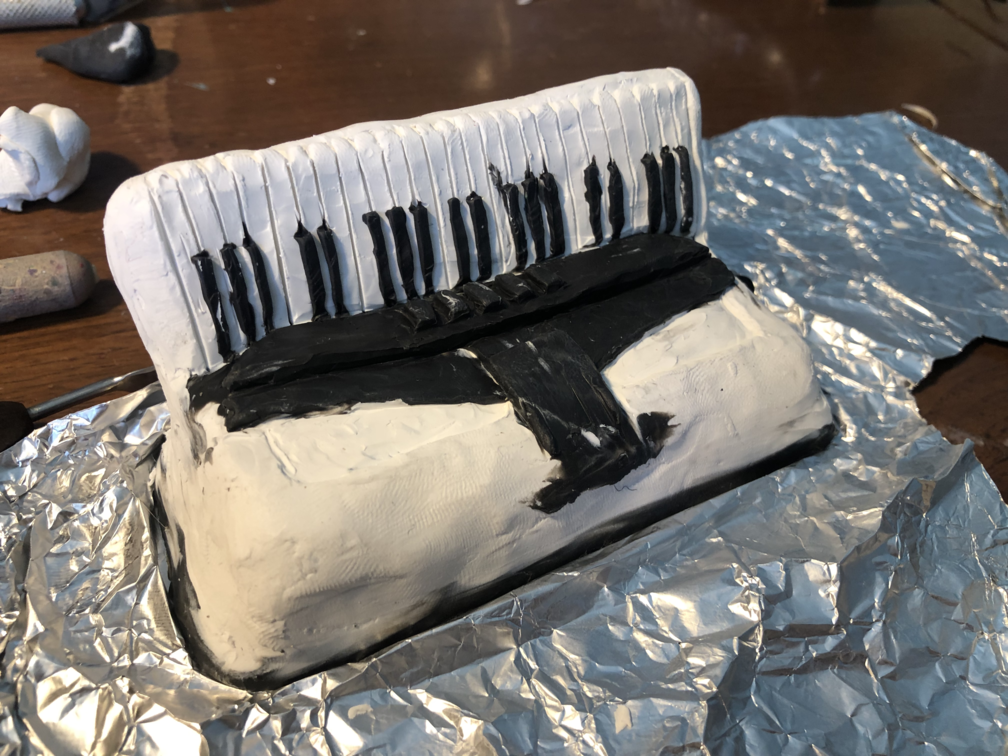
Finished keys
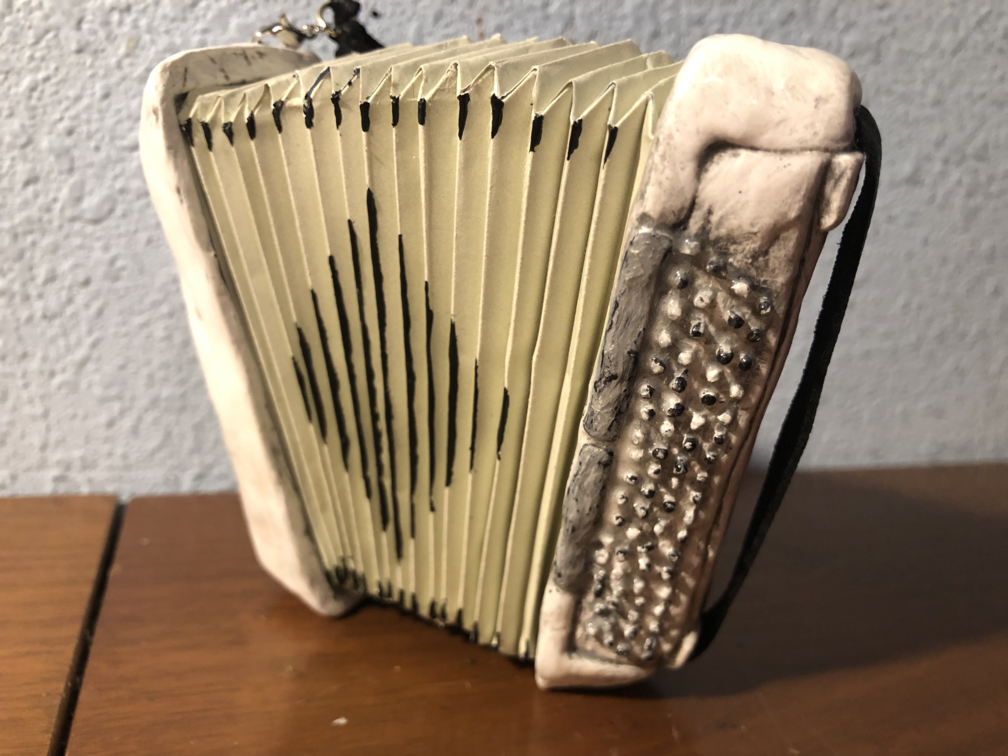
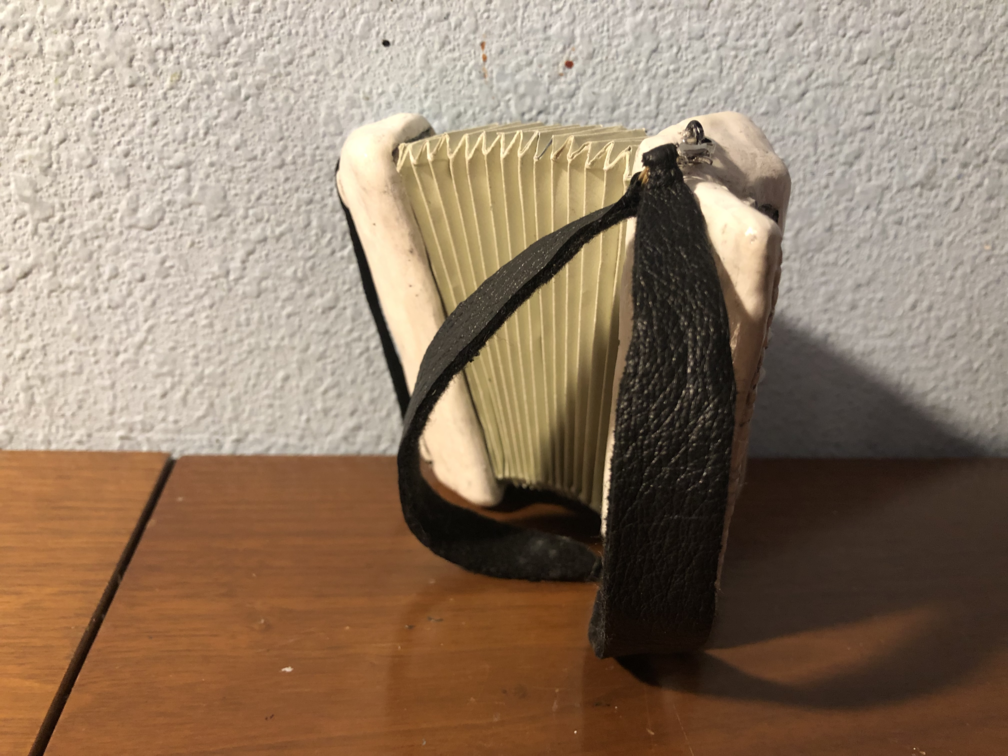
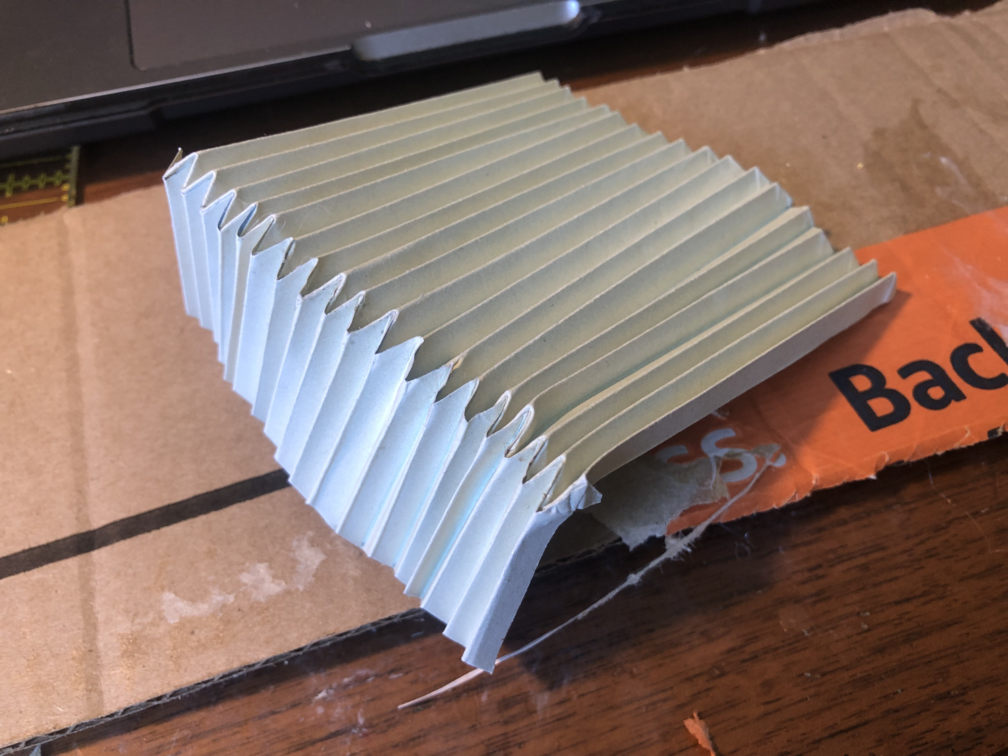
After baking, I sanded both pieces down. The bellows didn't quite fit, so I carved out more space for them with an X-acto knife.
Cutting out more space
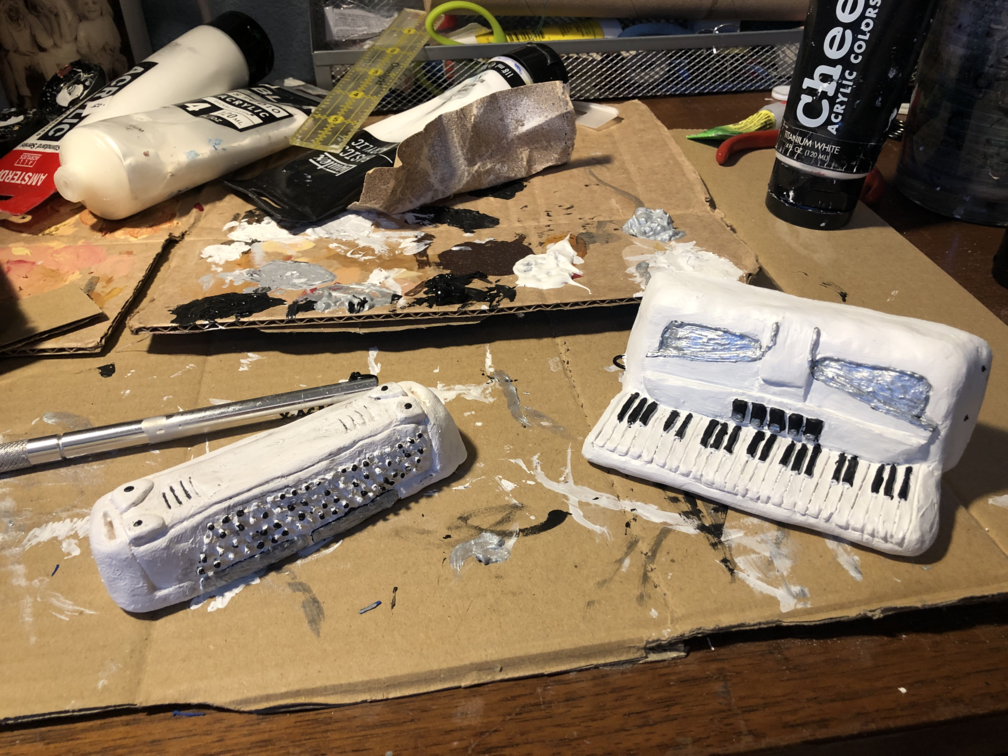
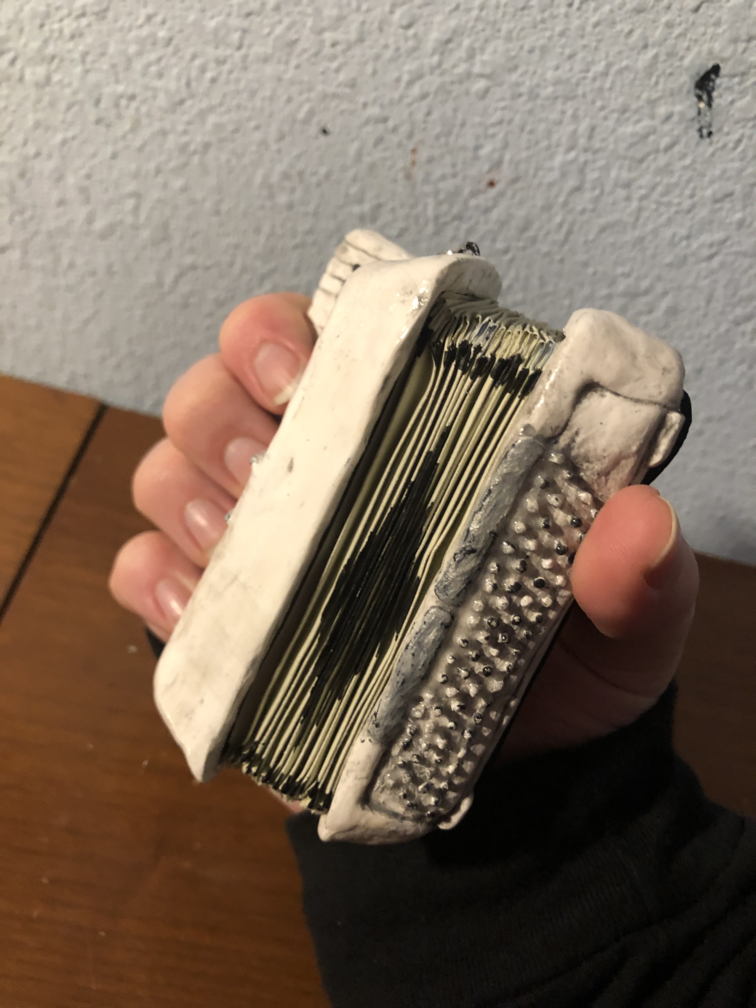
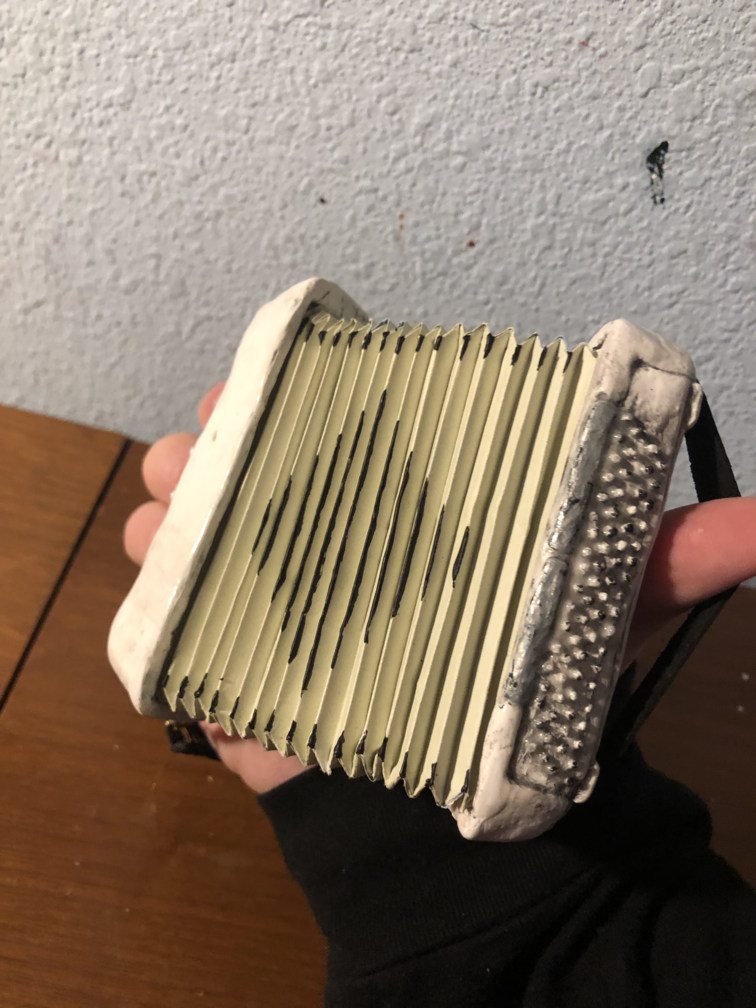
Painted

Weathered with a black wash coat
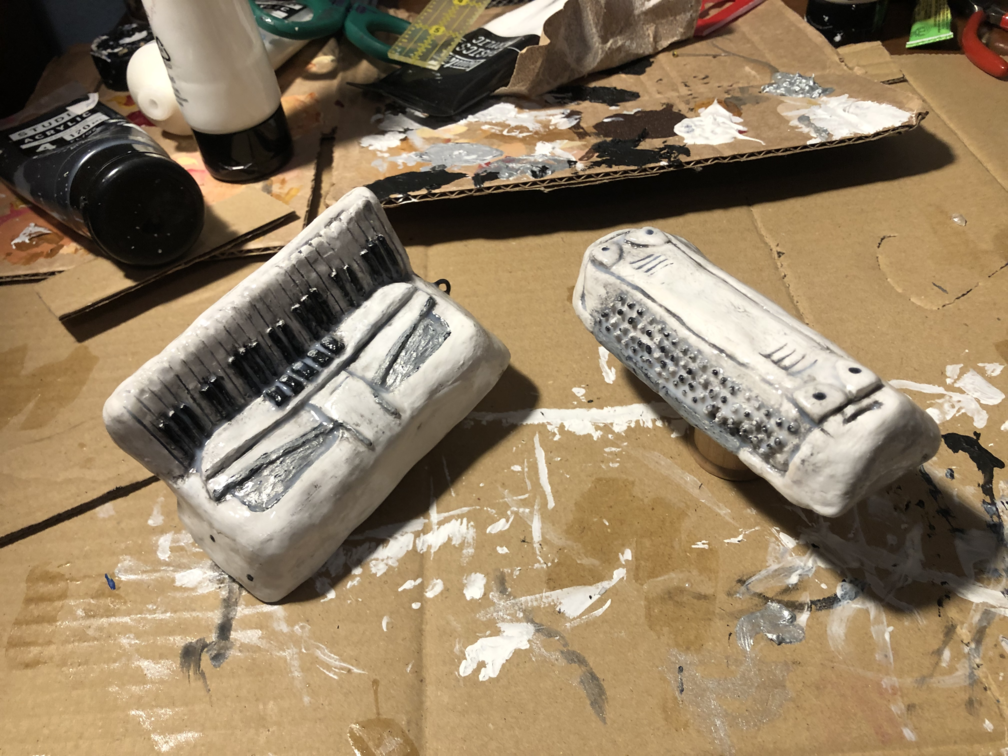
Sealed with paint-on glaze
May 13th
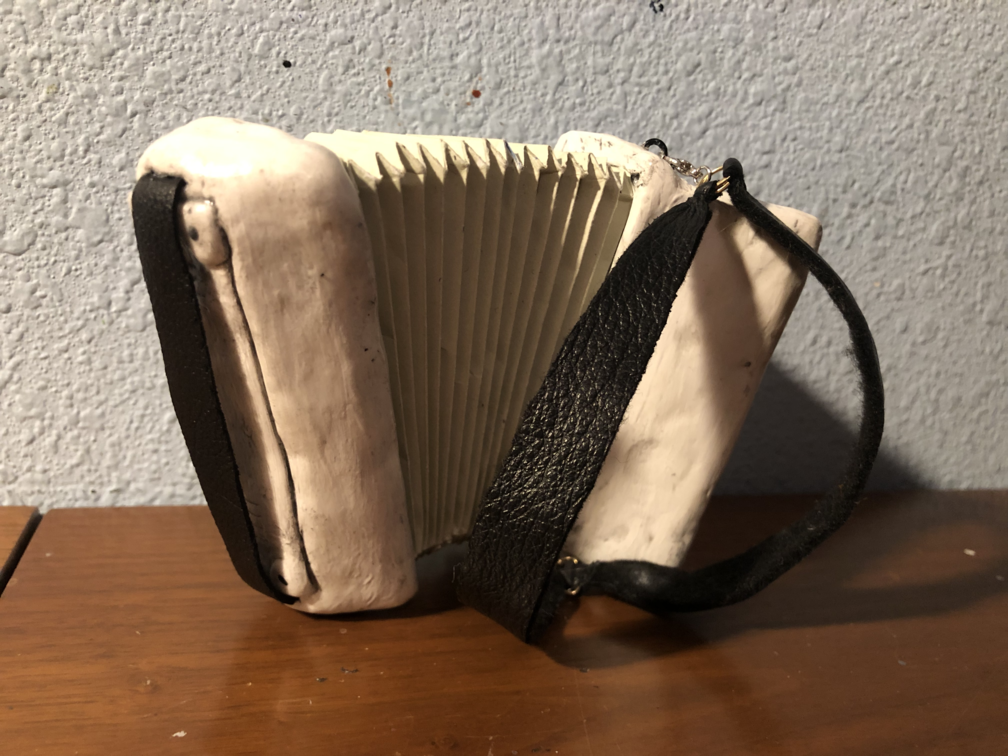
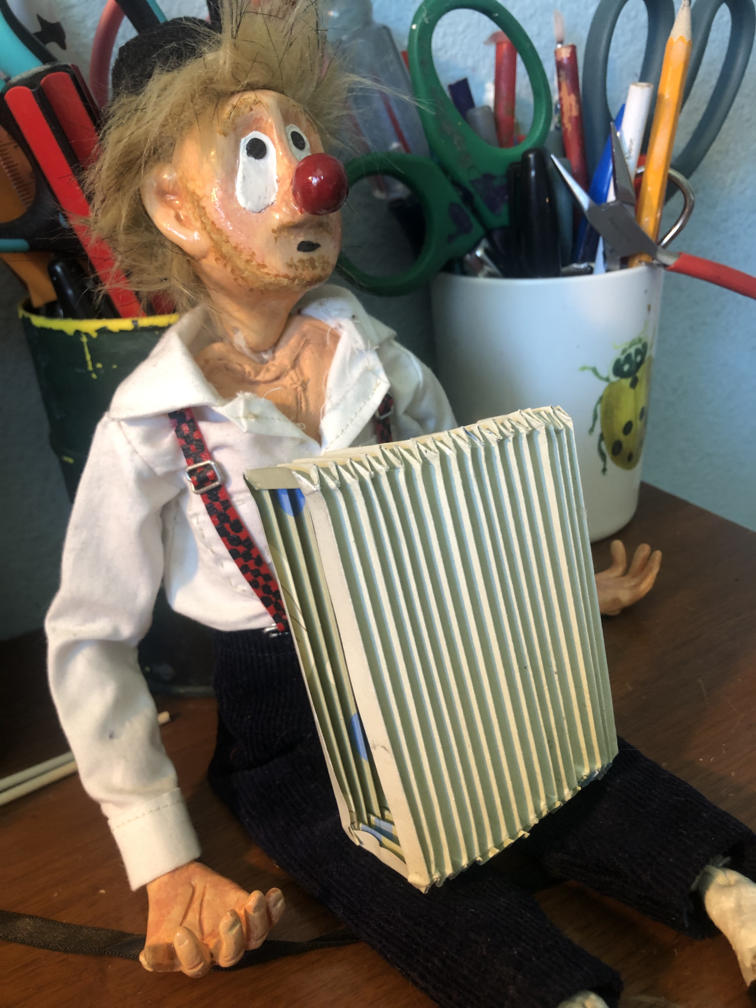
The separate pieces were done, I can finally glue them together! The bellows fit neatly inside and were superglued in place.
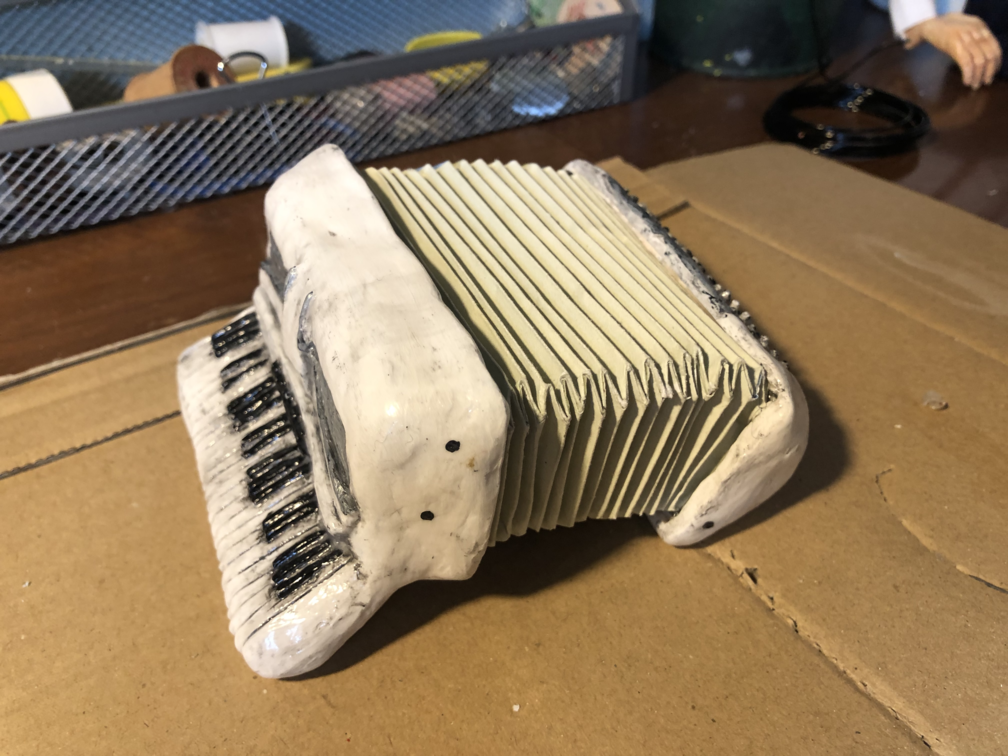

Painting on the detail to match the real-life reference
He still needed some way to carry it. I designed a pair of accordion straps and cut them out of leather. The ends are sewn on to loops which attach to clips, so they're removable just like the real thing. I had to add another wire loop to the bottom of the keyboard side so they had somewhere else to attach to.
Since the the leather itself was a bit thin and stretchy, I glued them both to a larger piece of felt, then cut off the excess.
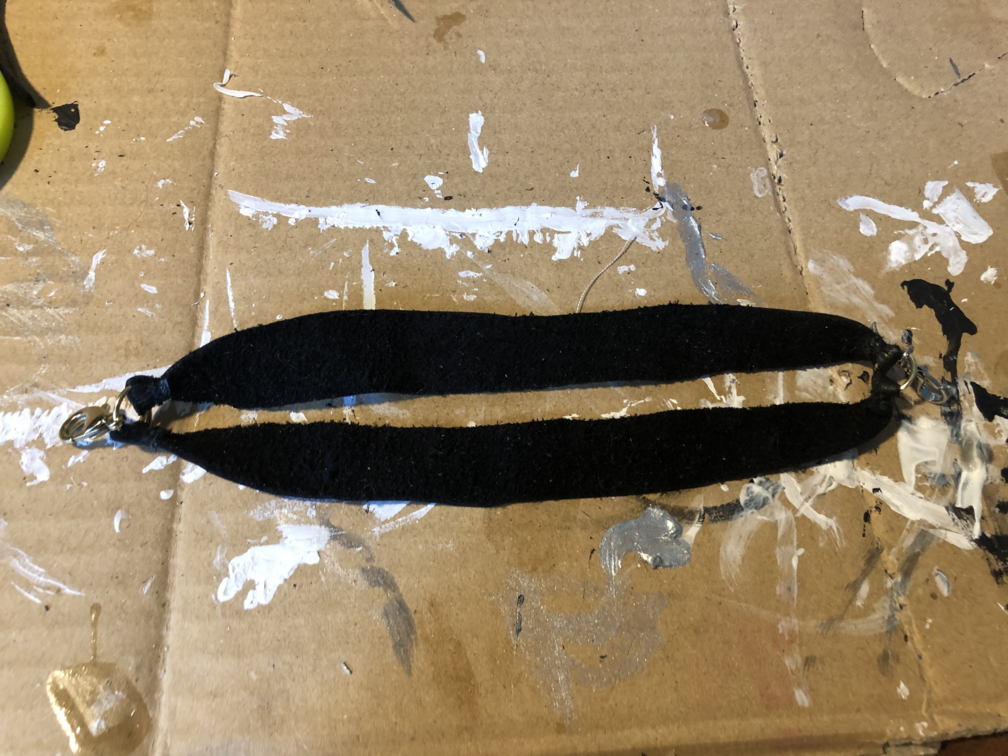
Leather straps
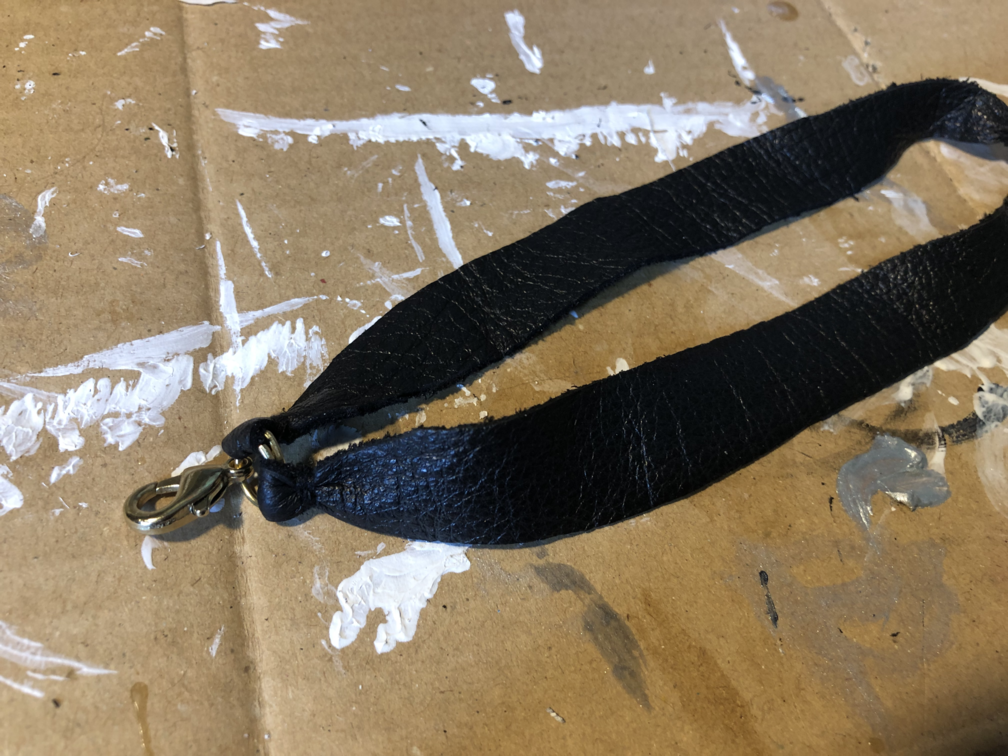
Sewn to clasp
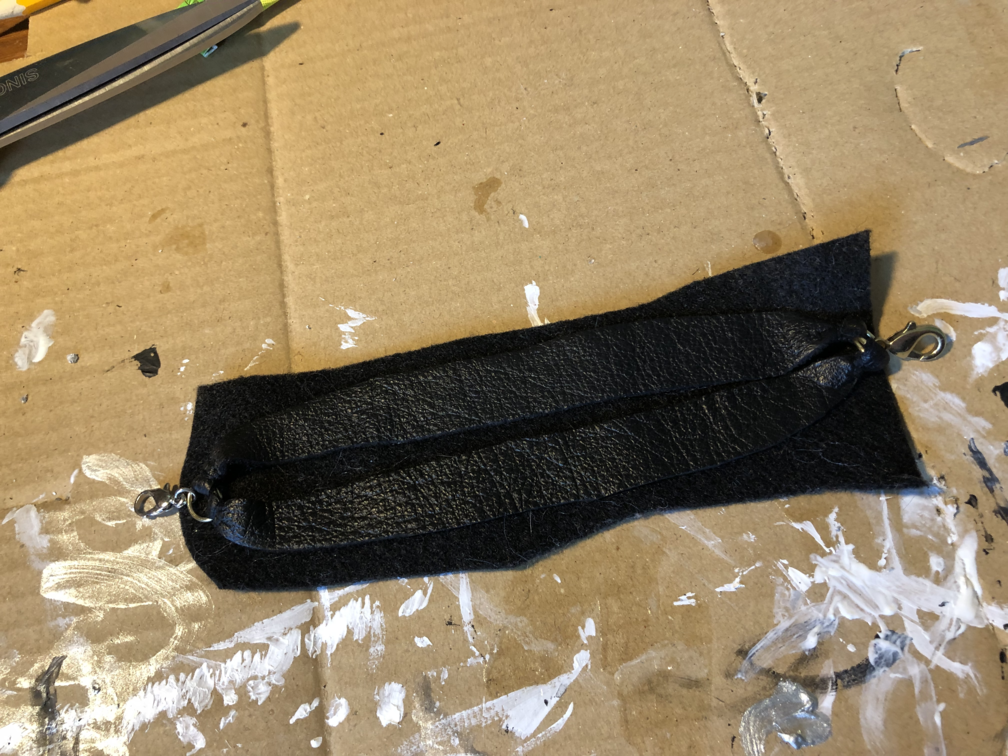
Glueing on the felt

Trimmed and neatened
External Links
 Website template: ©repth
Background image: Texture Town and Architextures
Box texture: Transparent Textures
Website template: ©repth
Background image: Texture Town and Architextures
Box texture: Transparent Textures
Brooklyn Williams 2024